[Blog]
- [Blog] ga4 Analytics Setting 방법
- [Blog] 깃허브 댓글 utterances 사용법
- [Blog] Google AdsensePermalink
- [Blog] Kakao Adfit
- [Blog] git_blog 검색엔진 세팅 등록(구글/네이버/다음)
- [Blog] git_blog Using multiple accounts
- [Blog] google indexing api 자동색인 처리해보자
- [Blog] 깃허브 댓글 giscus 사용법
검색엔진 등록 해서 블로그 유입수 증가 해보자
아직 처음이라 유저들이 블로그로 들어올수있게 검색엔진에 등록해보자!
검색엔진 등록전 준비 사항
1. sitemap.xml Setting
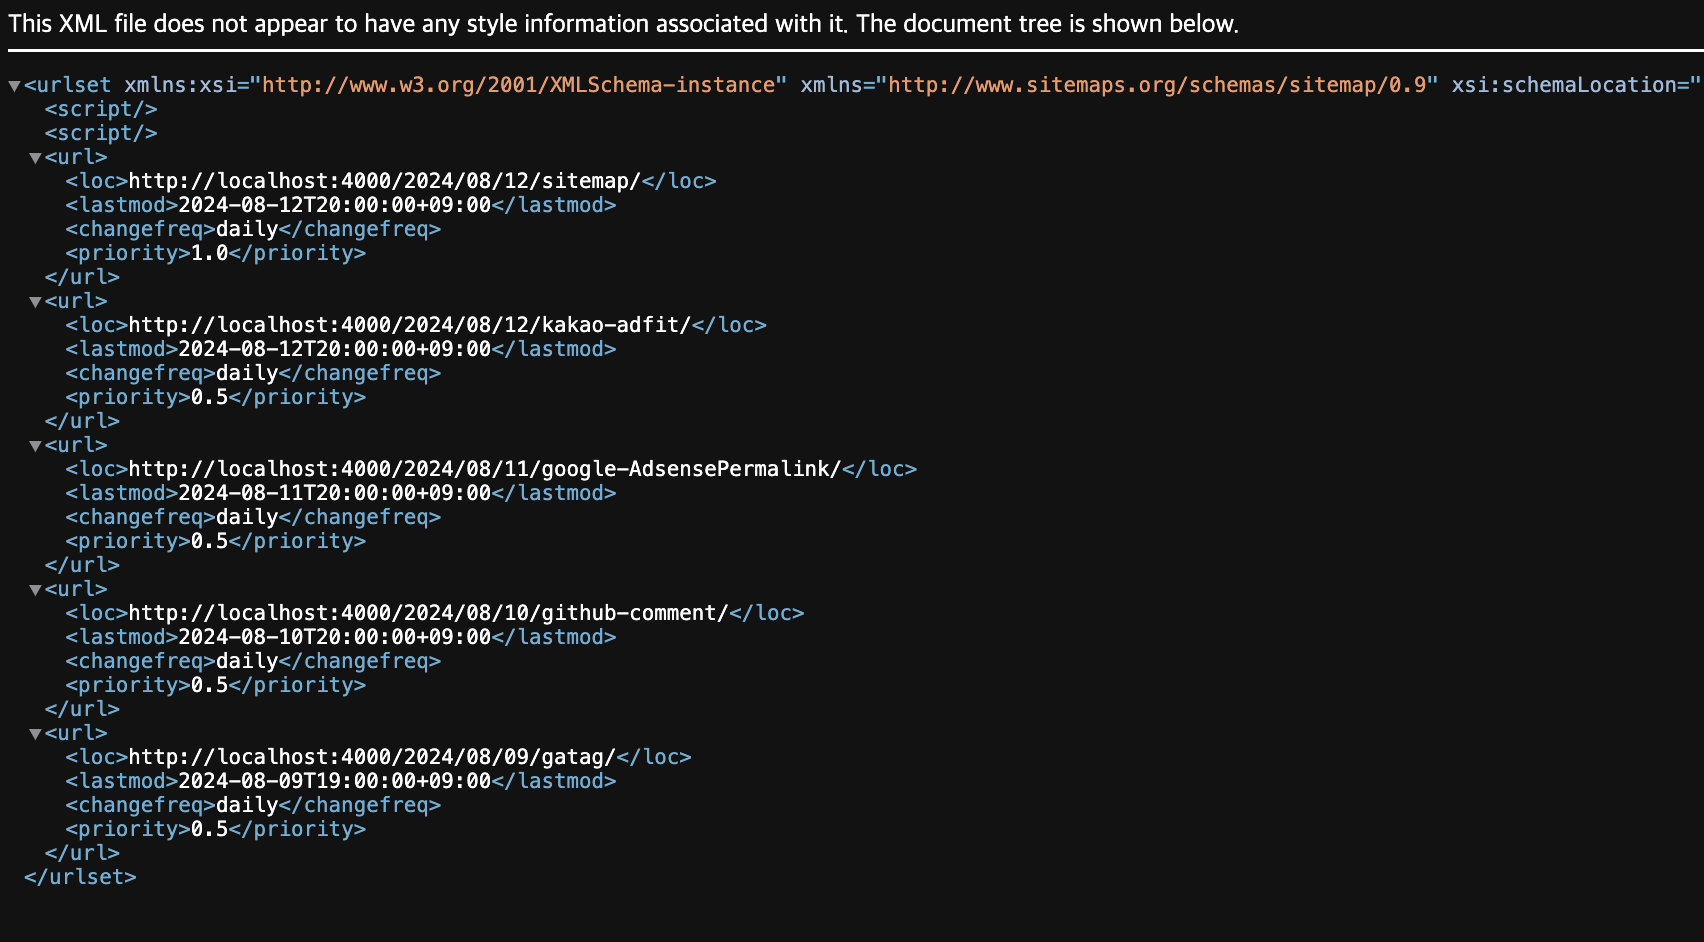
우리에 글들이 검색엔진에 검색되어서 노출될수있게, 사이트에 모든페이지 정보를 뿌려주는 sitemap.xml 이 필요하다.
 이처럼 모든페이지에 정보를 넣어줘야되는데 매번 할수없으니
《 sitemap.xml 》 root 경로에 추가
1
2
3
4
5
6
7
8
9
10
11
12
13
14
15
16
17
18
19
20
21
22
23
24
25
26
<?xml version="1.0" encoding="UTF-8"?>
<urlset xmlns:xsi="http://www.w3.org/2001/XMLSchema-instance" xsi:schemaLocation="http://www.sitemaps.org/schemas/sitemap/0.9 http://www.sitemaps.org/schemas/sitemap/0.9/sitemap.xsd" xmlns="http://www.sitemaps.org/schemas/sitemap/0.9">
  {% for post in site.posts %}
    <url>
      <loc>{{ site.url }}{{ post.url }}</loc>
      {% if post.lastmod == null %}
        <lastmod>{{ post.date | date_to_xmlschema }}</lastmod>
      {% else %}
        <lastmod>{{ post.lastmod | date_to_xmlschema }}</lastmod>
      {% endif %}

      {% if post.sitemap.changefreq == null %}
        <changefreq>daily</changefreq>
      {% else %}
        <changefreq>{{ post.sitemap.changefreq }}</changefreq>
      {% endif %}

      {% if post.sitemap.priority == null %}
          <priority>0.5</priority>
      {% else %}
        <priority>{{ post.sitemap.priority }}</priority>
      {% endif %}

    </url>
  {% endfor %}
</urlset>
코드를 복사하여 sitmap.xml 파일에 복붙!
2. sitemap 설정
1
2
3
4
5
6
7
8
9
---
...

lastmod:
sitemap:
changefreq: daily #스크랩 주기 daily | weekly | monthly
priority: 1.0 # 스크랩 우선순위

---
- lastmod: 마지막 수정일
스크랩 주기 (데일리, 위클리 등…)
너무 짧게 설정하면 스크랩이 많아져 안좋아질수있다. - sitemap.changefreq
스크랩 우선순위
위에 1,2번을 매번 할수없기에 sitemap.xml에 디폴트 설정 해두었음
3. robots.txt Setting
사이트를 검색엔진에 등록하면 검색엔진의 크롤러가 사이트를 방문하여 크롤링함.
크롤러가 왔을때 정책을 명시해주는 기능
《 robots.txt 》 sitemap과 동일하게 root경로에 파일을 만들어준다.
User-agent: *
Allow: /
Sitemap: https://pocodingwer.github.io/sitemap.xml
4. feed.xml Setting
Rss Feed도 등록 가능하게 feed.xml 추가 《 feed.xml 》 동일하게 root경로에 파일을 만들어준다.
1
2
3
4
5
6
7
8
9
10
11
12
13
14
15
16
17
18
19
20
21
22
23
24
25
26
27
28
29
30
---
layout: null
---
<?xml version="1.0" encoding="UTF-8"?>
<rss version="2.0" xmlns:atom="http://www.w3.org/2005/Atom">
  <channel>
    <title>{{ site.title | xml_escape }}</title>
    <description>{{ site.description | xml_escape }}</description>
    <link>{{ site.url }}{{ site.baseurl }}/</link>
    <atom:link href="{{ "/feed.xml" | prepend: site.baseurl | prepend: site.url }}" rel="self" type="application/rss+xml" />
    <pubDate>{{ site.time | date_to_rfc822 }}</pubDate>
    <lastBuildDate>{{ site.time | date_to_rfc822 }}</lastBuildDate>
    <generator>Jekyll v{{ jekyll.version }}</generator>
    {% for post in site.posts limit:10 %}
      <item>
        <title>{{ post.title | xml_escape }}</title>
        <description>{{ post.content | xml_escape }}</description>
        <pubDate>{{ post.date | date_to_rfc822 }}</pubDate>
        <link>{{ post.url | prepend: site.baseurl | prepend: site.url }}</link>
        <guid isPermaLink="true">{{ post.url | prepend: site.baseurl | prepend: site.url }}</guid>
        {% for tag in post.tags %}
        <category>{{ tag | xml_escape }}</category>
        {% endfor %}
        {% for cat in post.categories %}
        <category>{{ cat | xml_escape }}</category>
        {% endfor %}
      </item>
    {% endfor %}
  </channel>
</rss>
준비 끝!
검색엔진 등록하기
준비가 완료되었으면 등록해보기
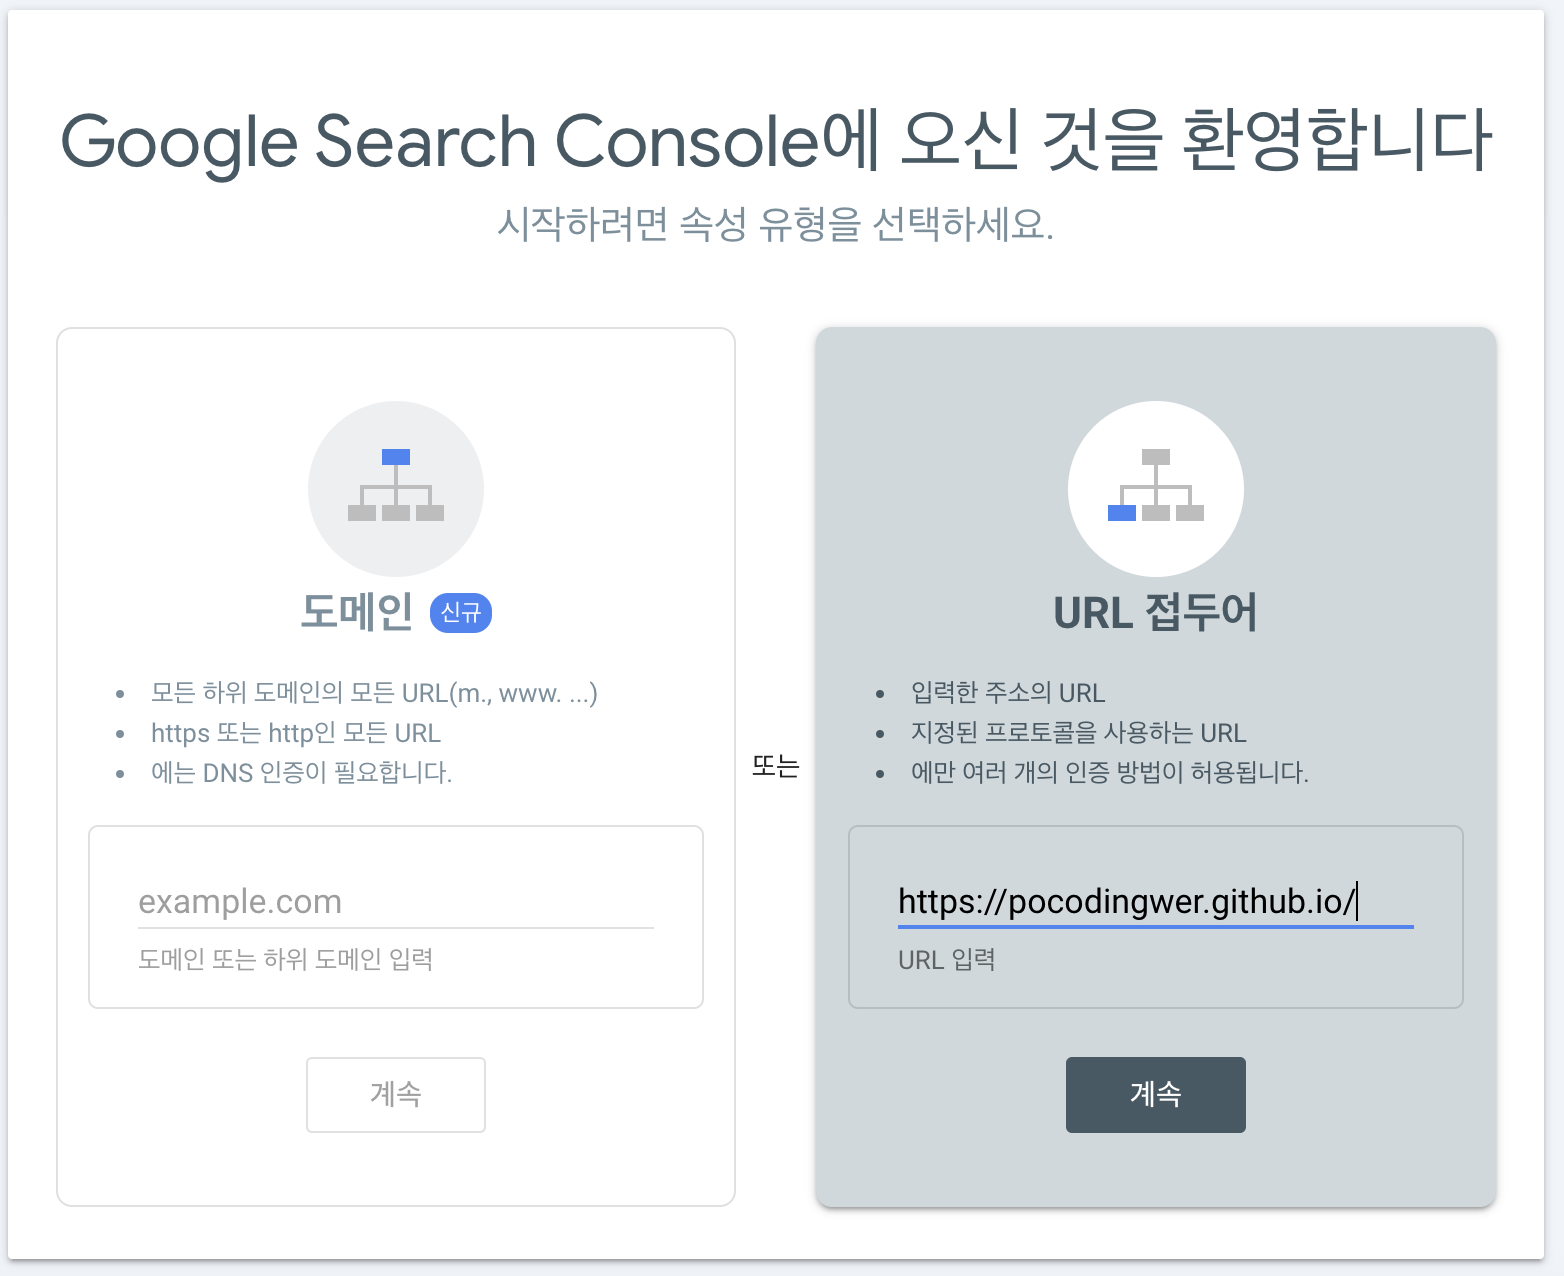
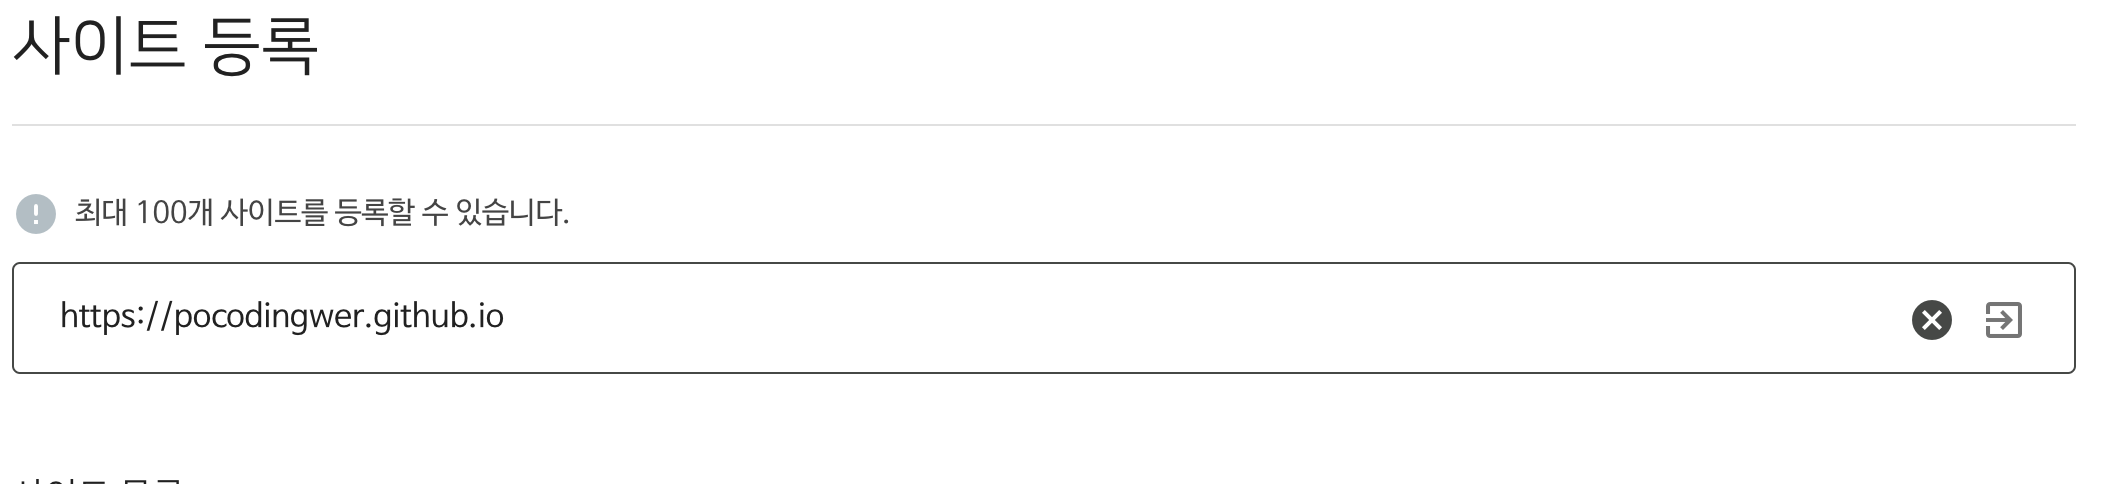
1. 구글
-
url 입력
- 파일 다운로드후 root.경로에 삽입
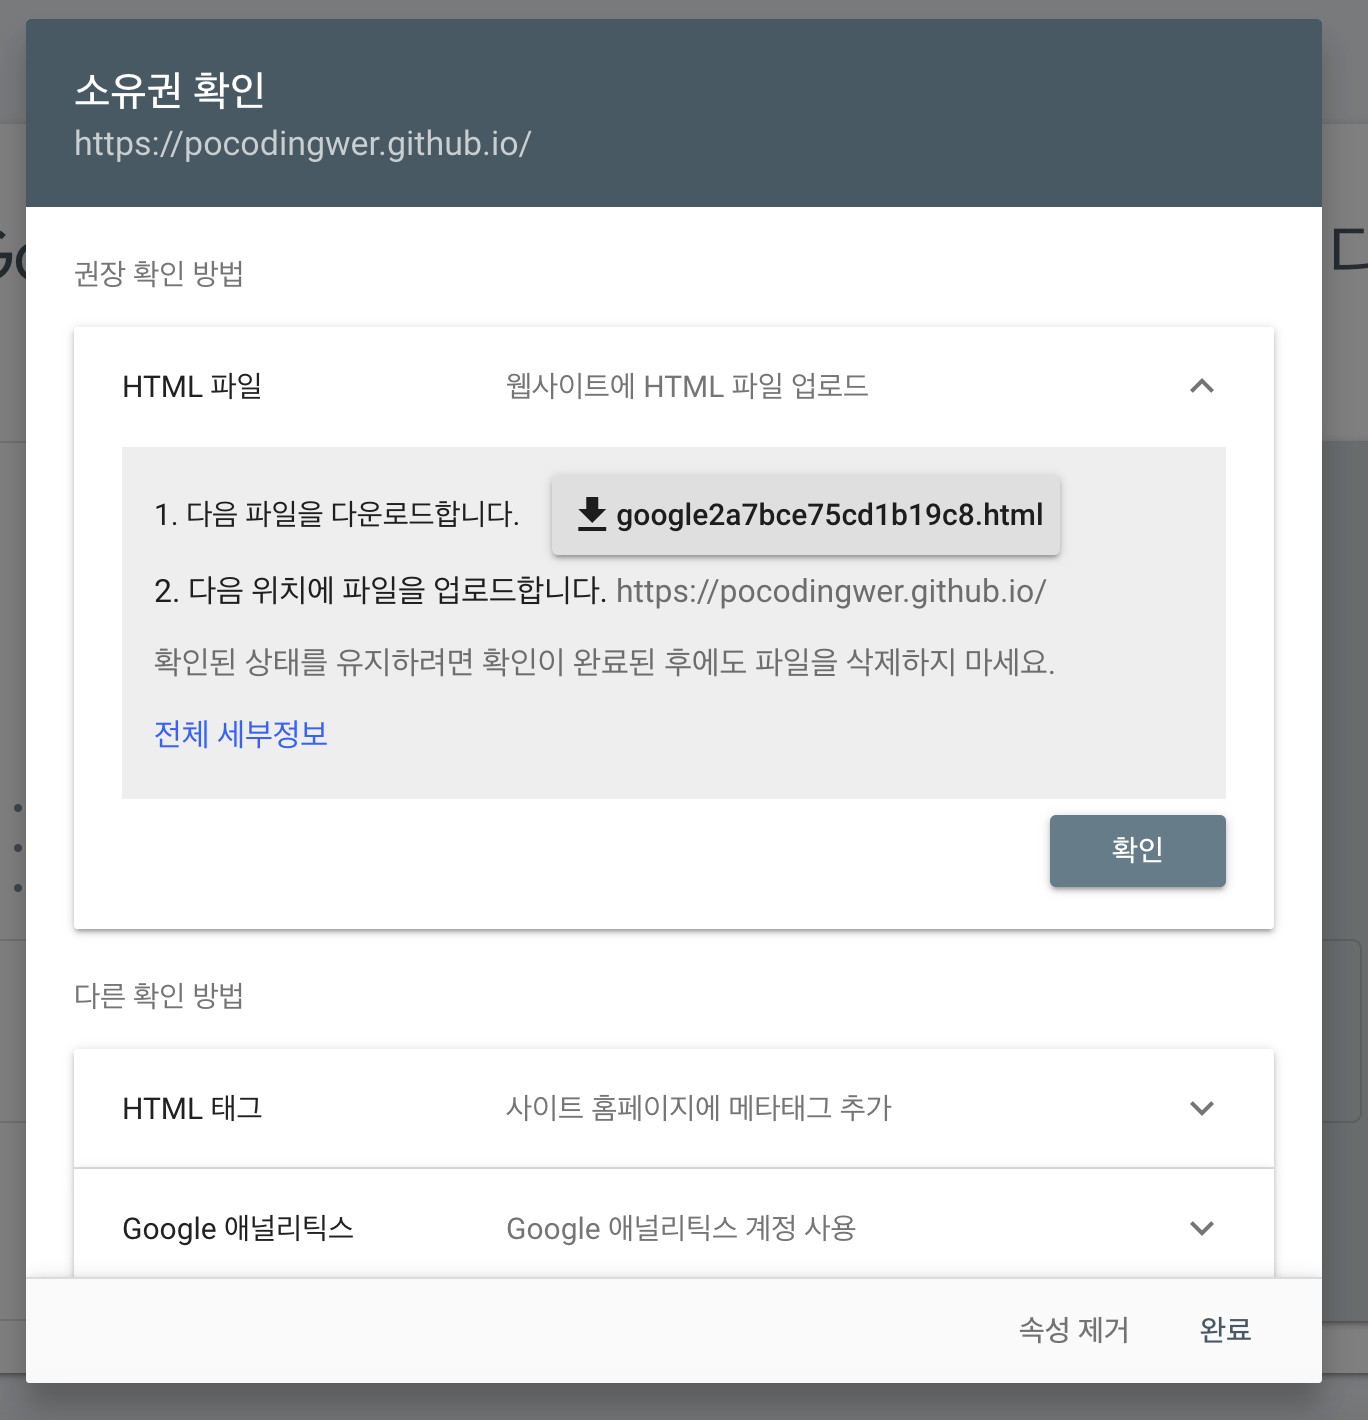
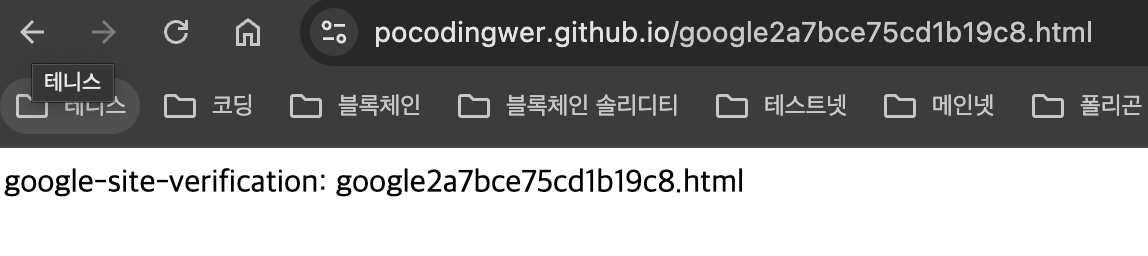
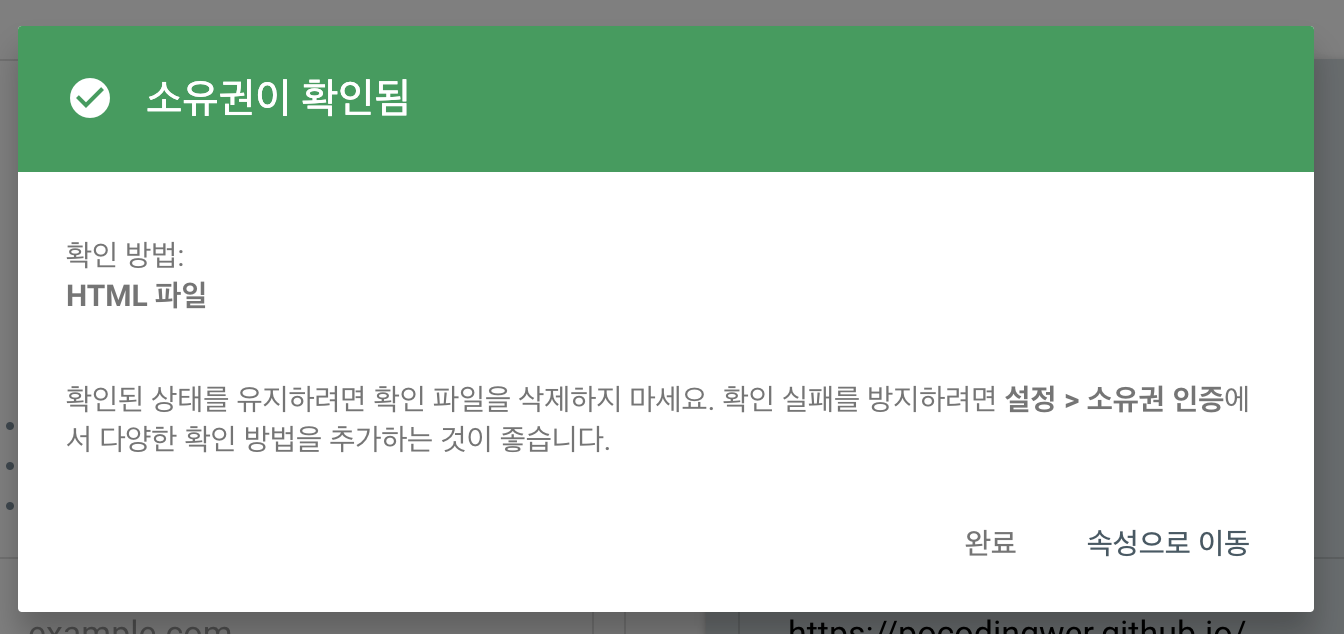
잘업로드되었나 확인 《 구글 도메인인증 》 접속
- 《 google Search console 》 ->sitemap 이동 -> 깃헙주소 + sitemap.xml 제출!
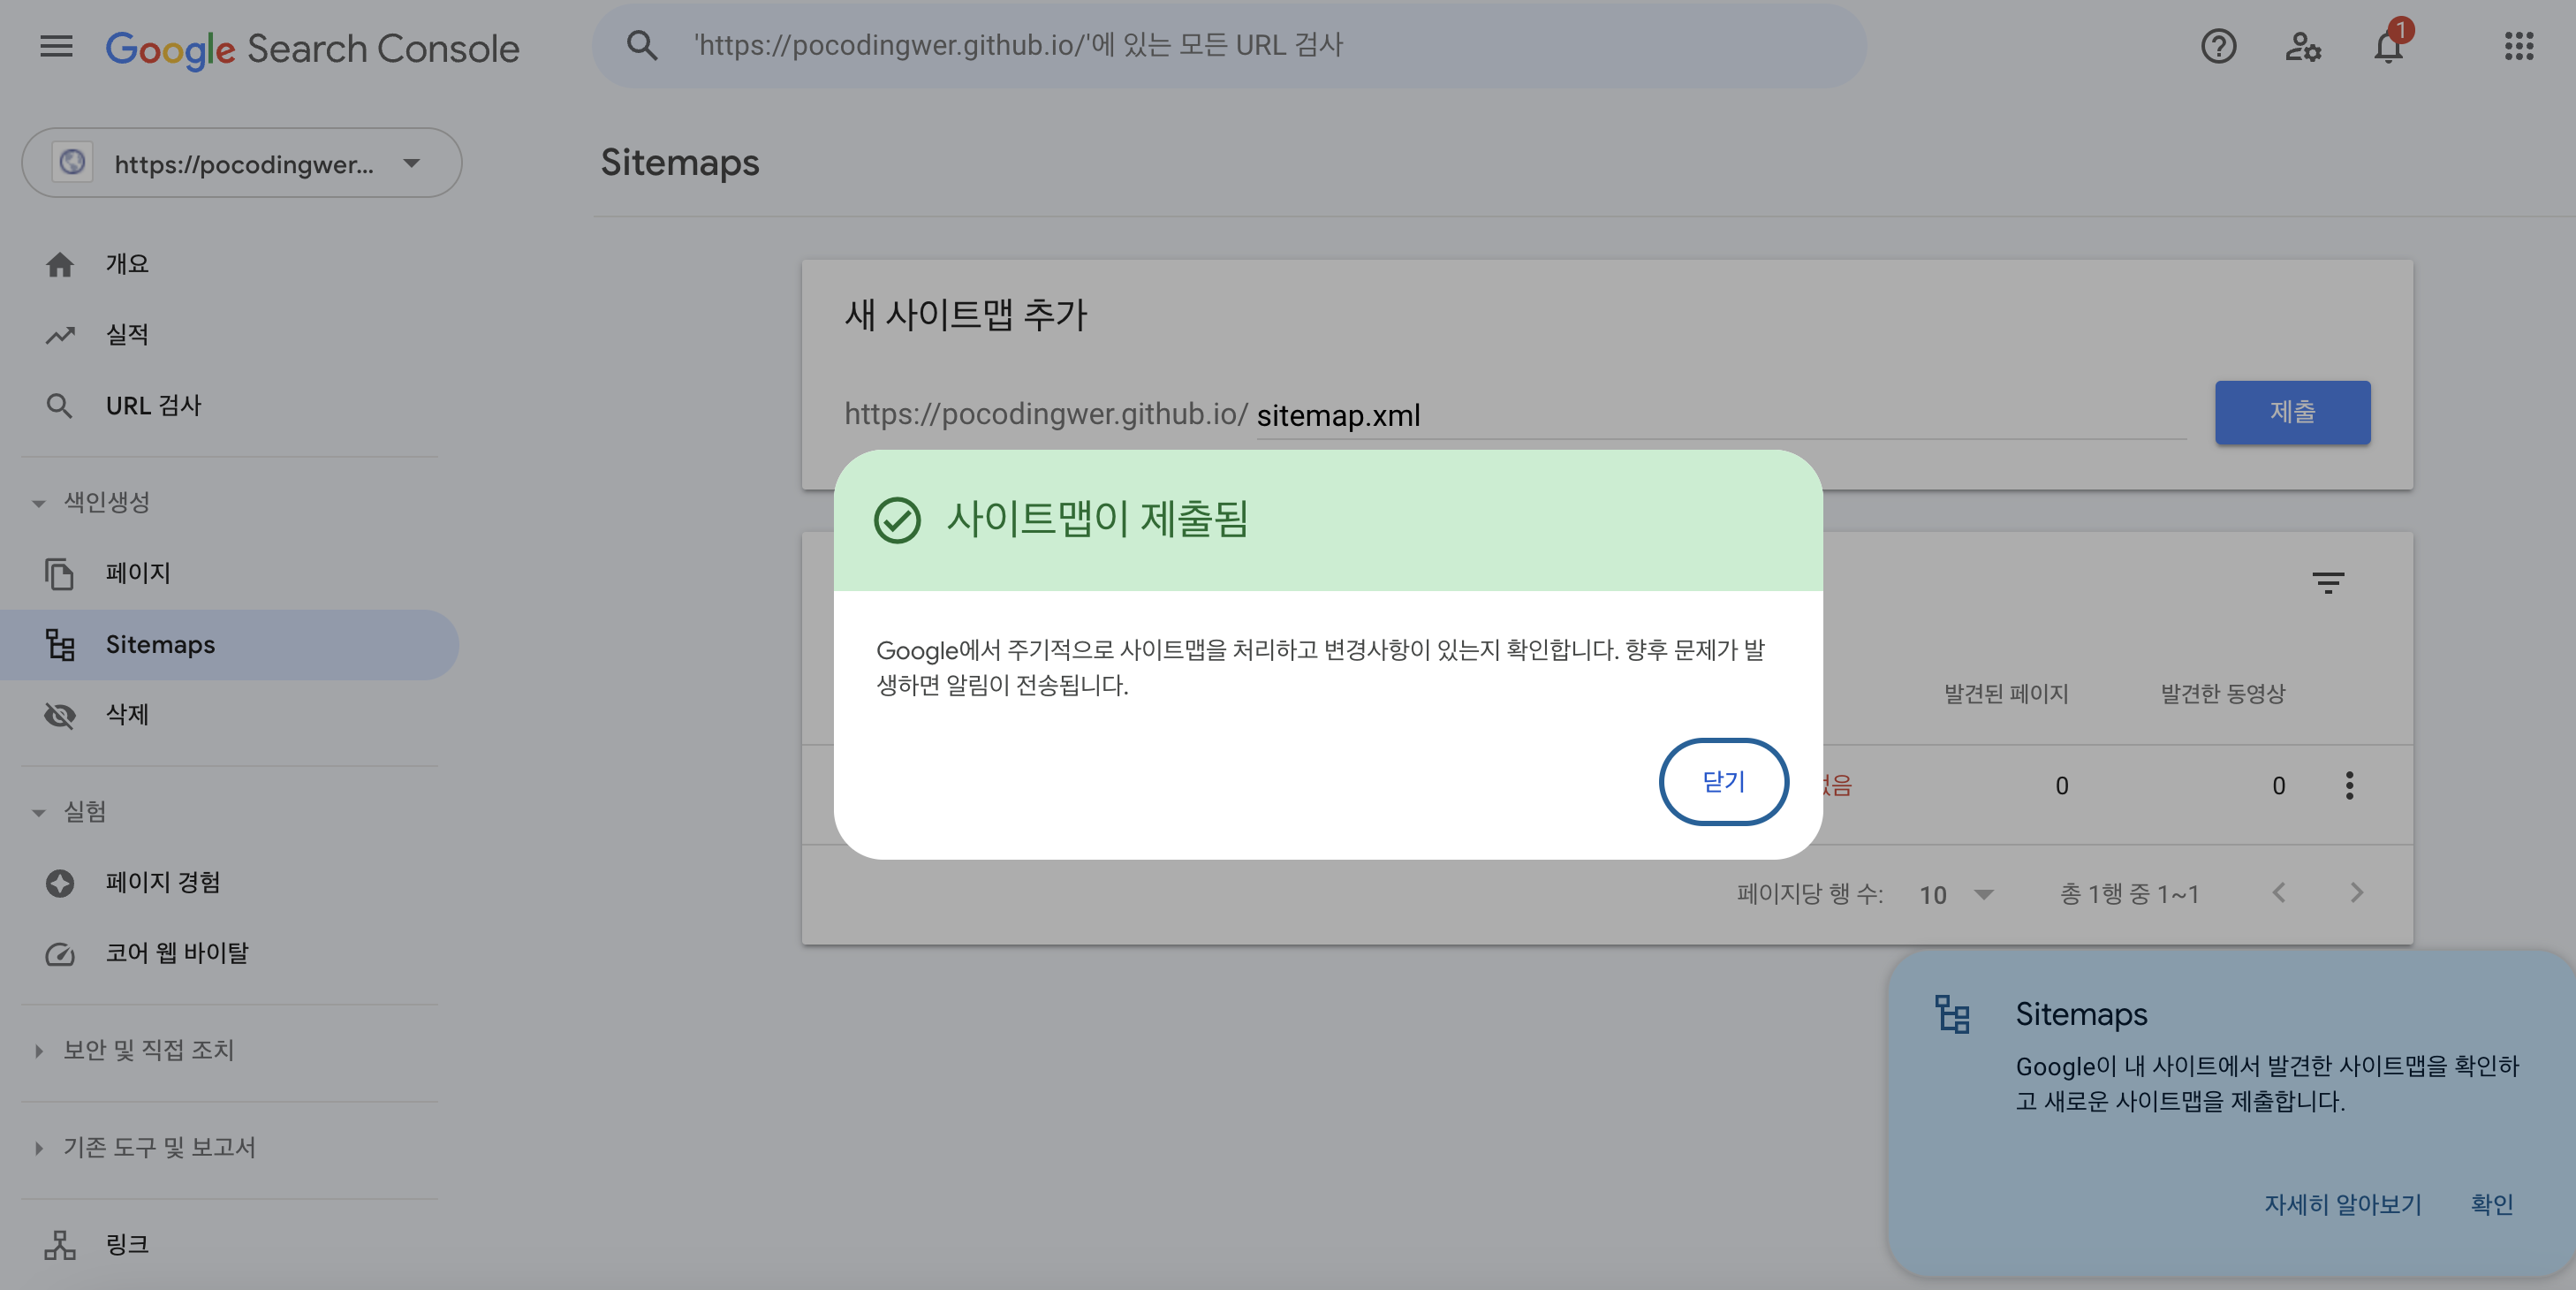
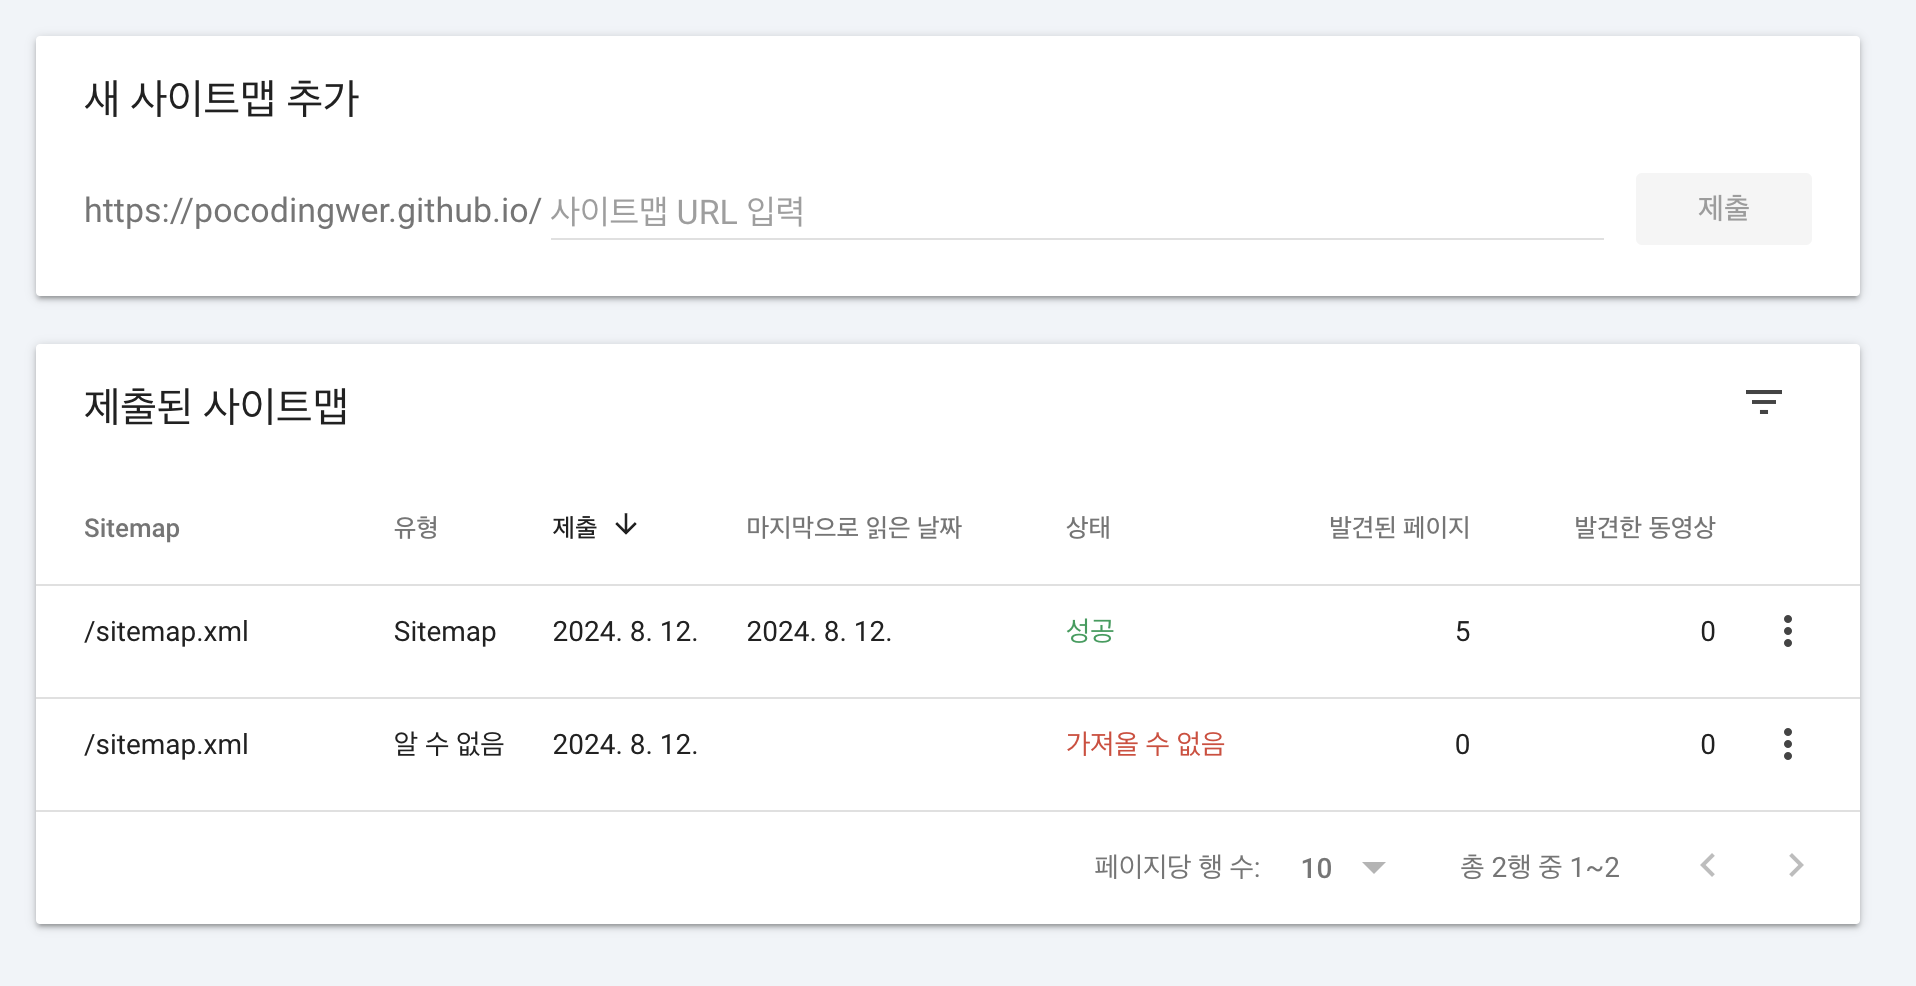 주소가 잘못되어서 크롤링 하지못하는 이슈가 발생했었다. !! 주소확인잘해야됨!!
2. 네이버
-
네이버서치어드바이저 《 naver searchadvisor 》 접속
-
웹 마스터도구
-
구글과 같이 다운로드후 root.경로에 삽입
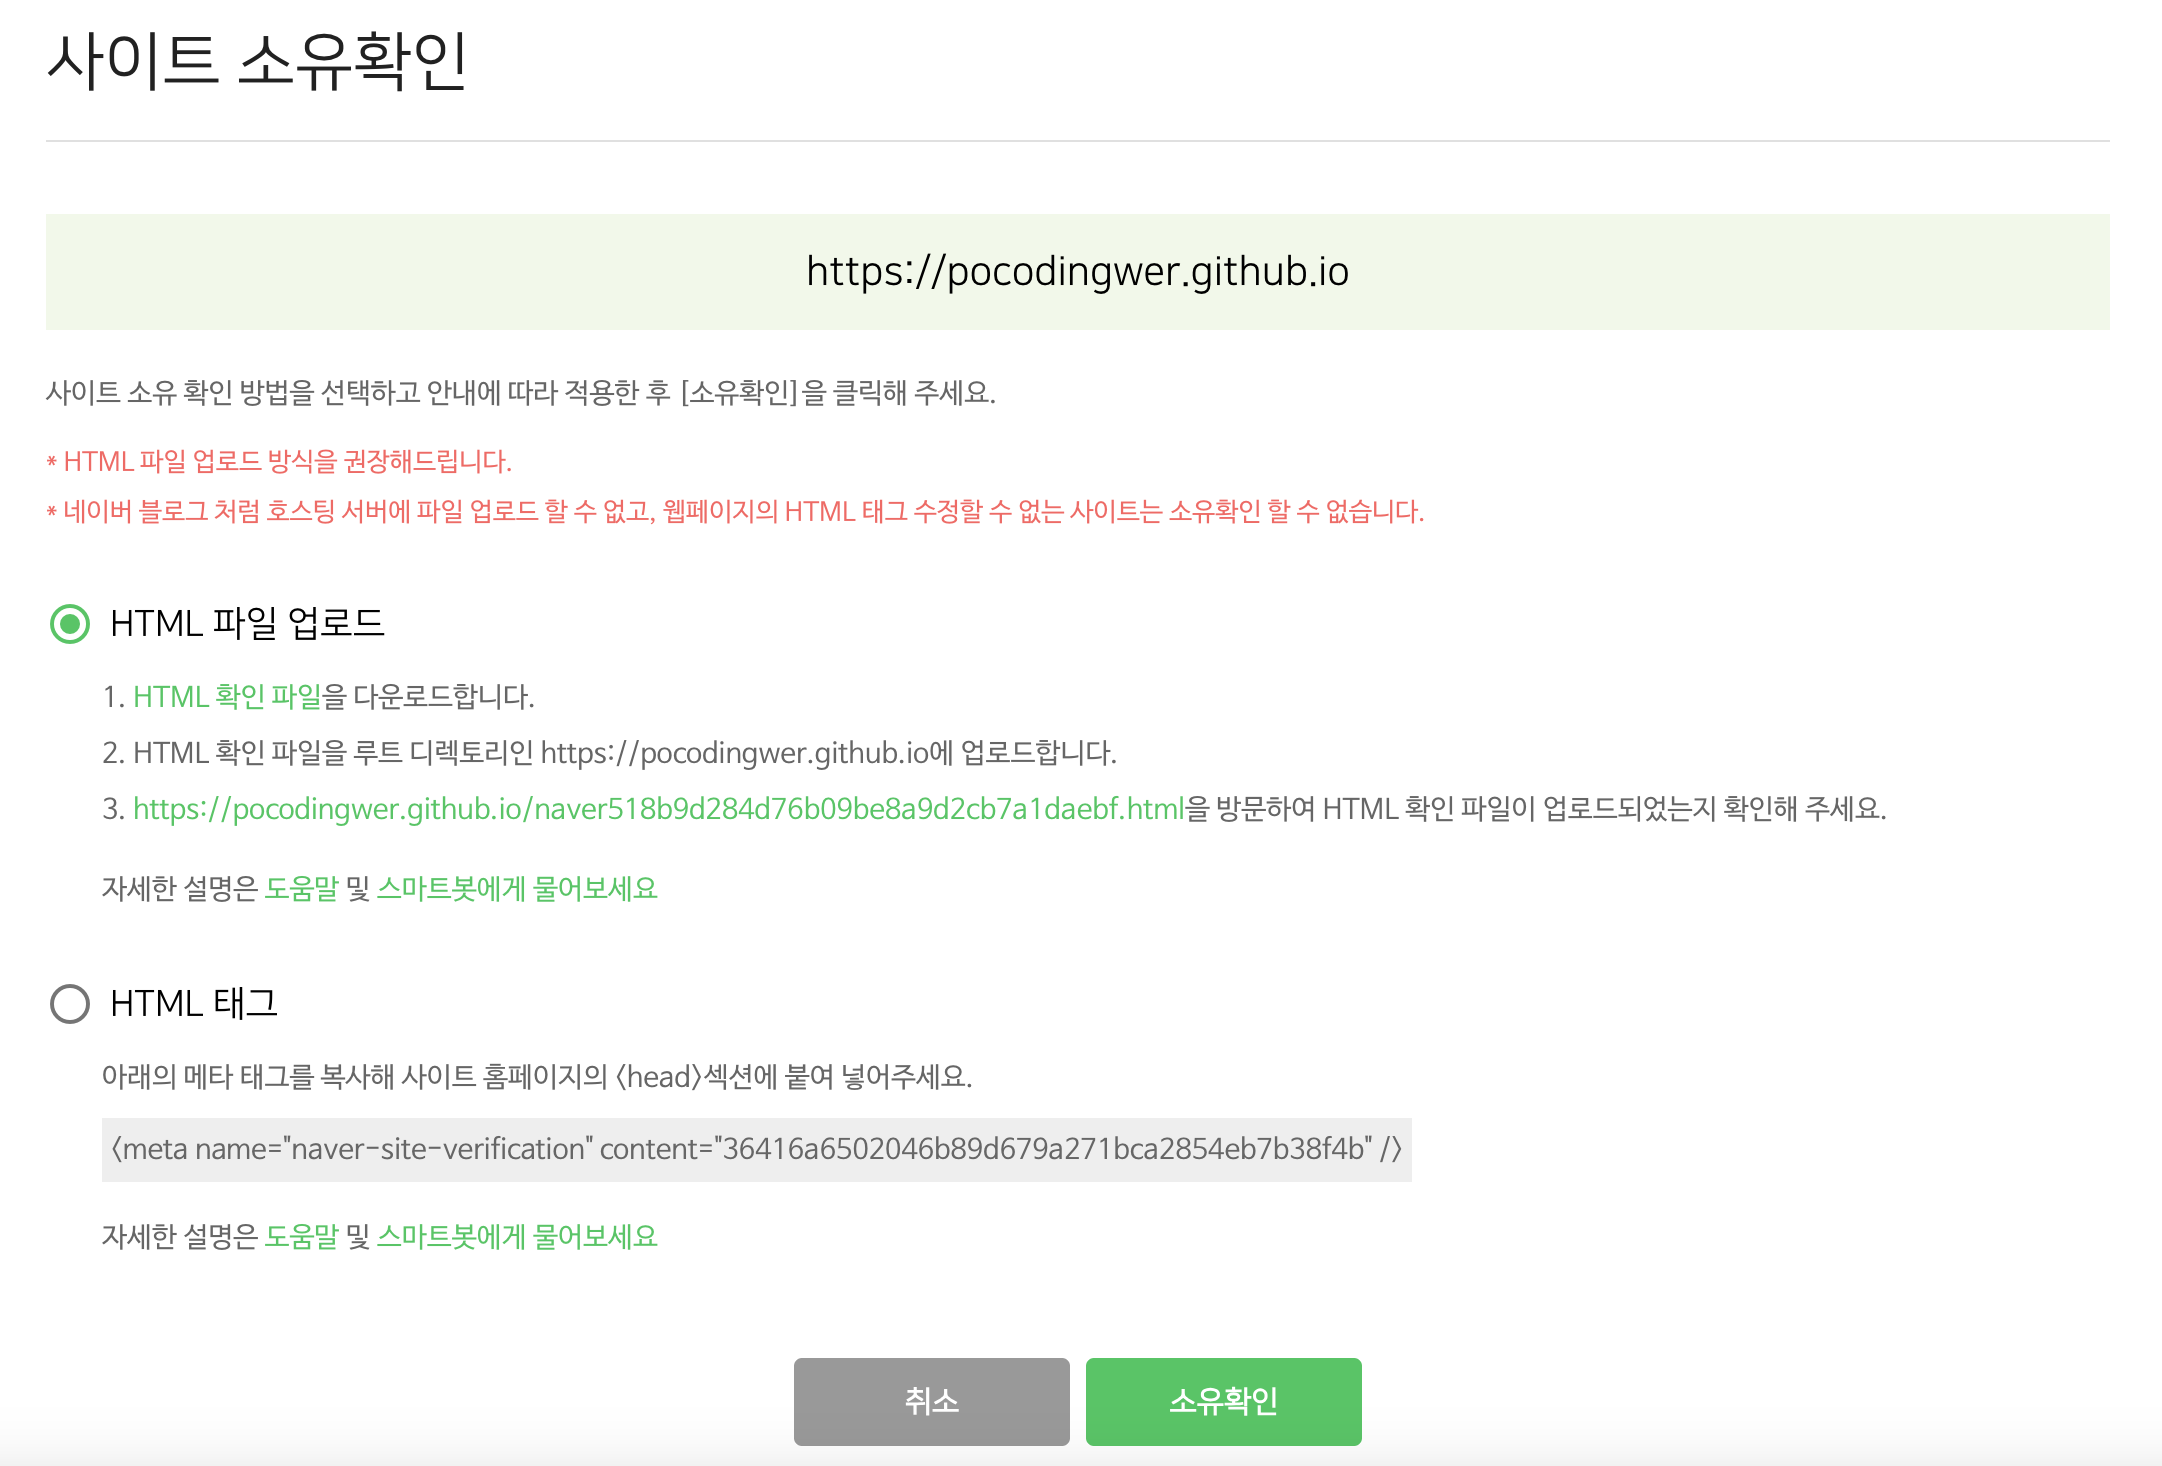
잘업로드되었나 확인 《 naver 도메인인증 》 접속
-
등록완료되었다.

-
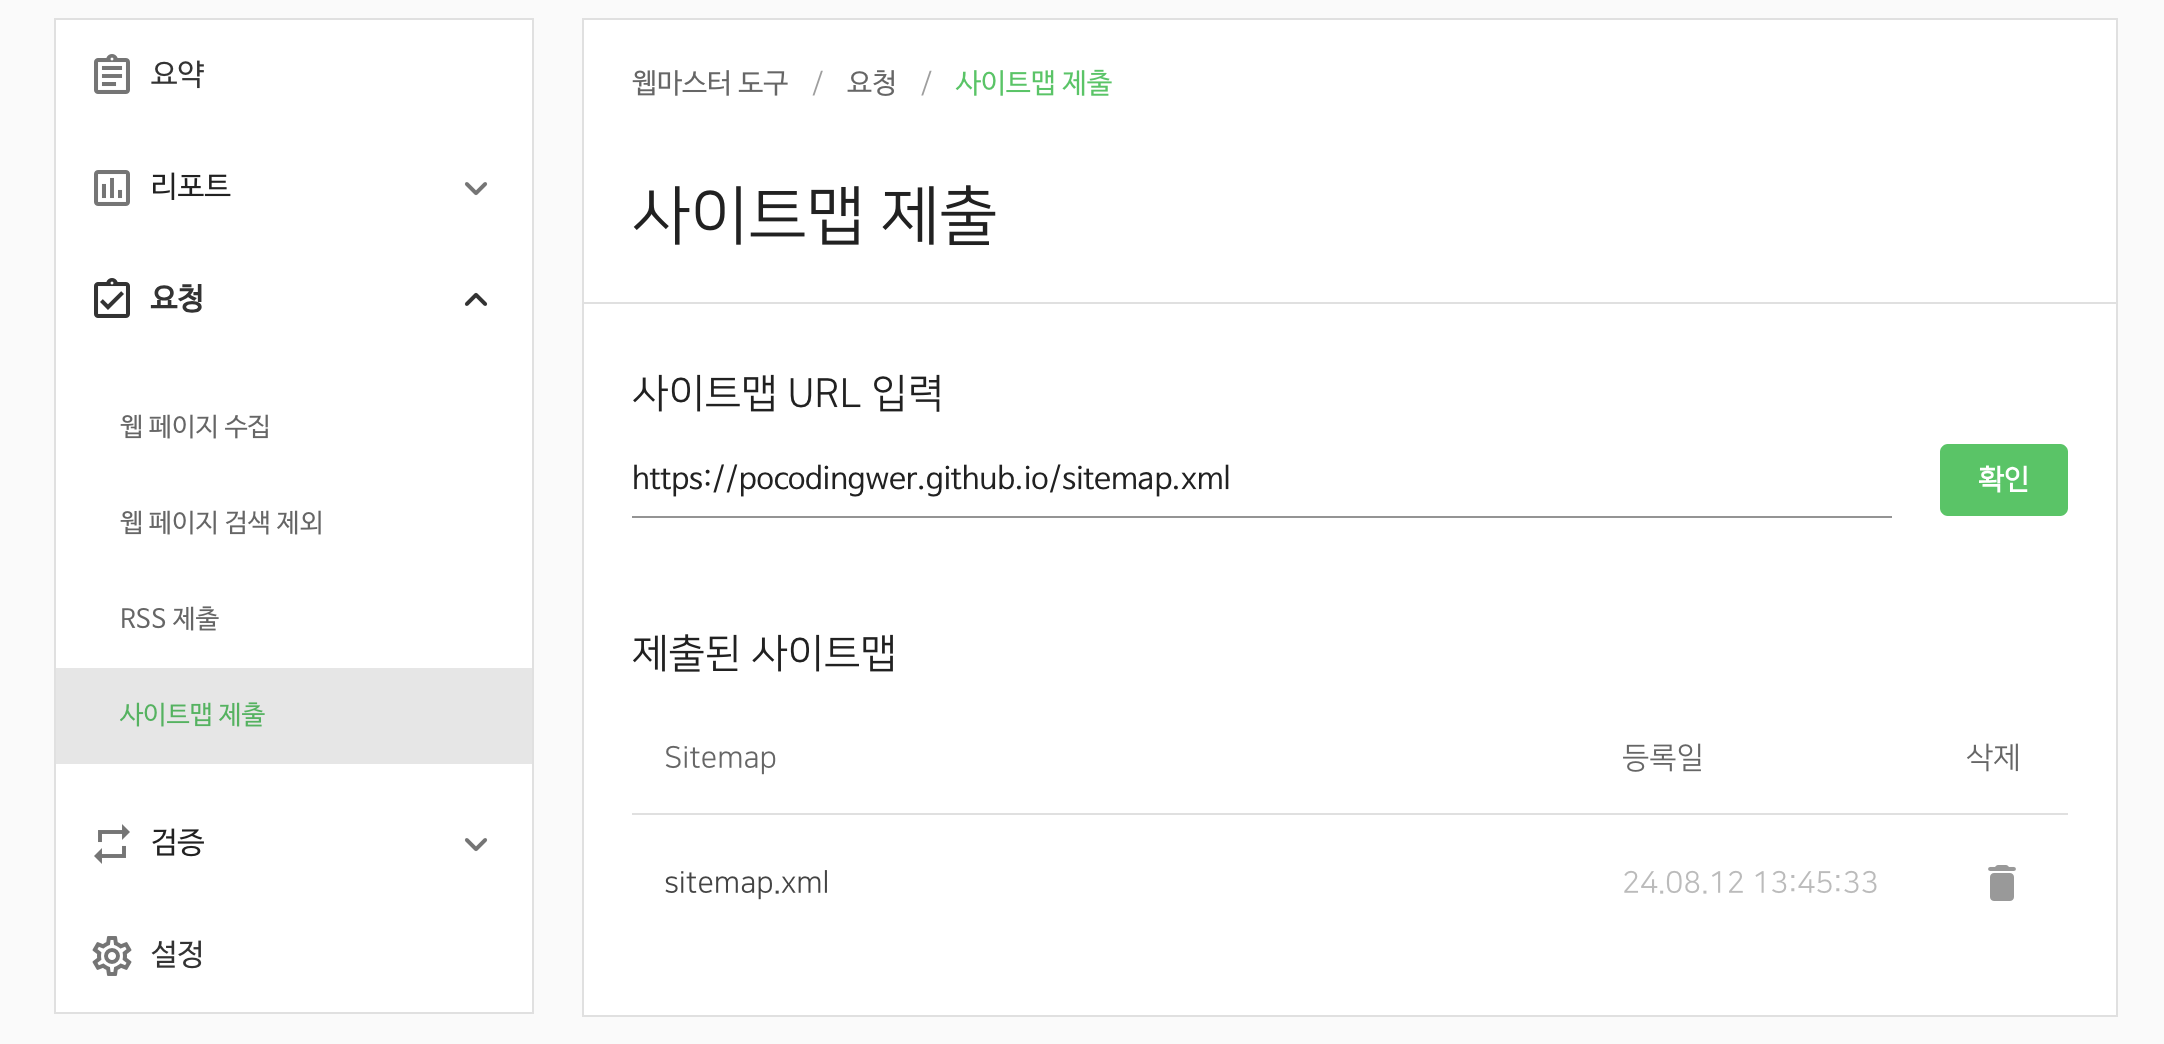
사이트-> 요청-> 사이트맵 제출 -> sitemap.xml 제출
-
웹마스터 도구 ->간단체크
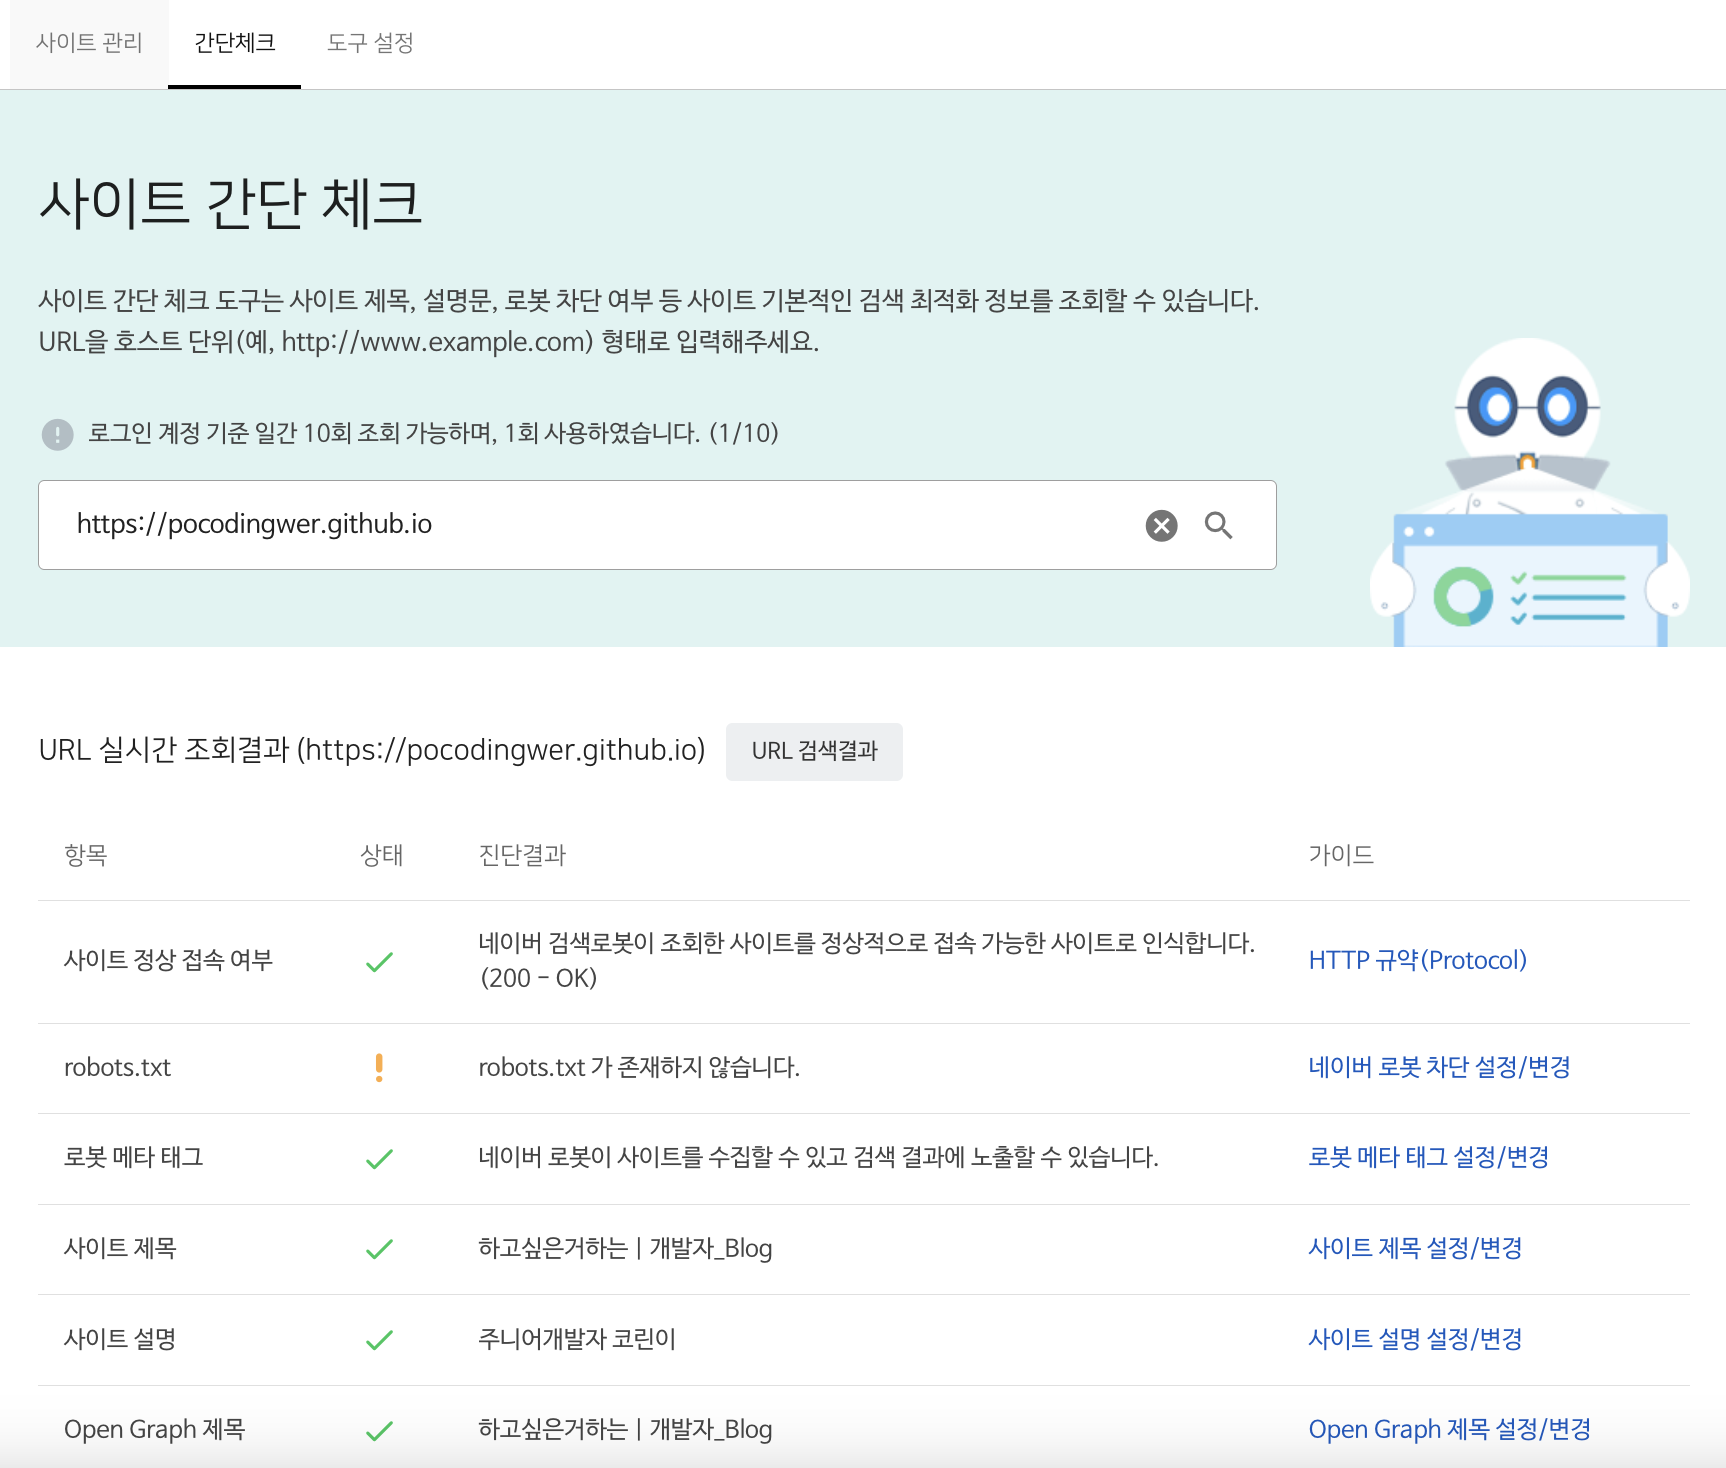
왜?? robots.txt 없다고나온다??
-> 파일명이 잘못되어있어서 다시 설정해줌.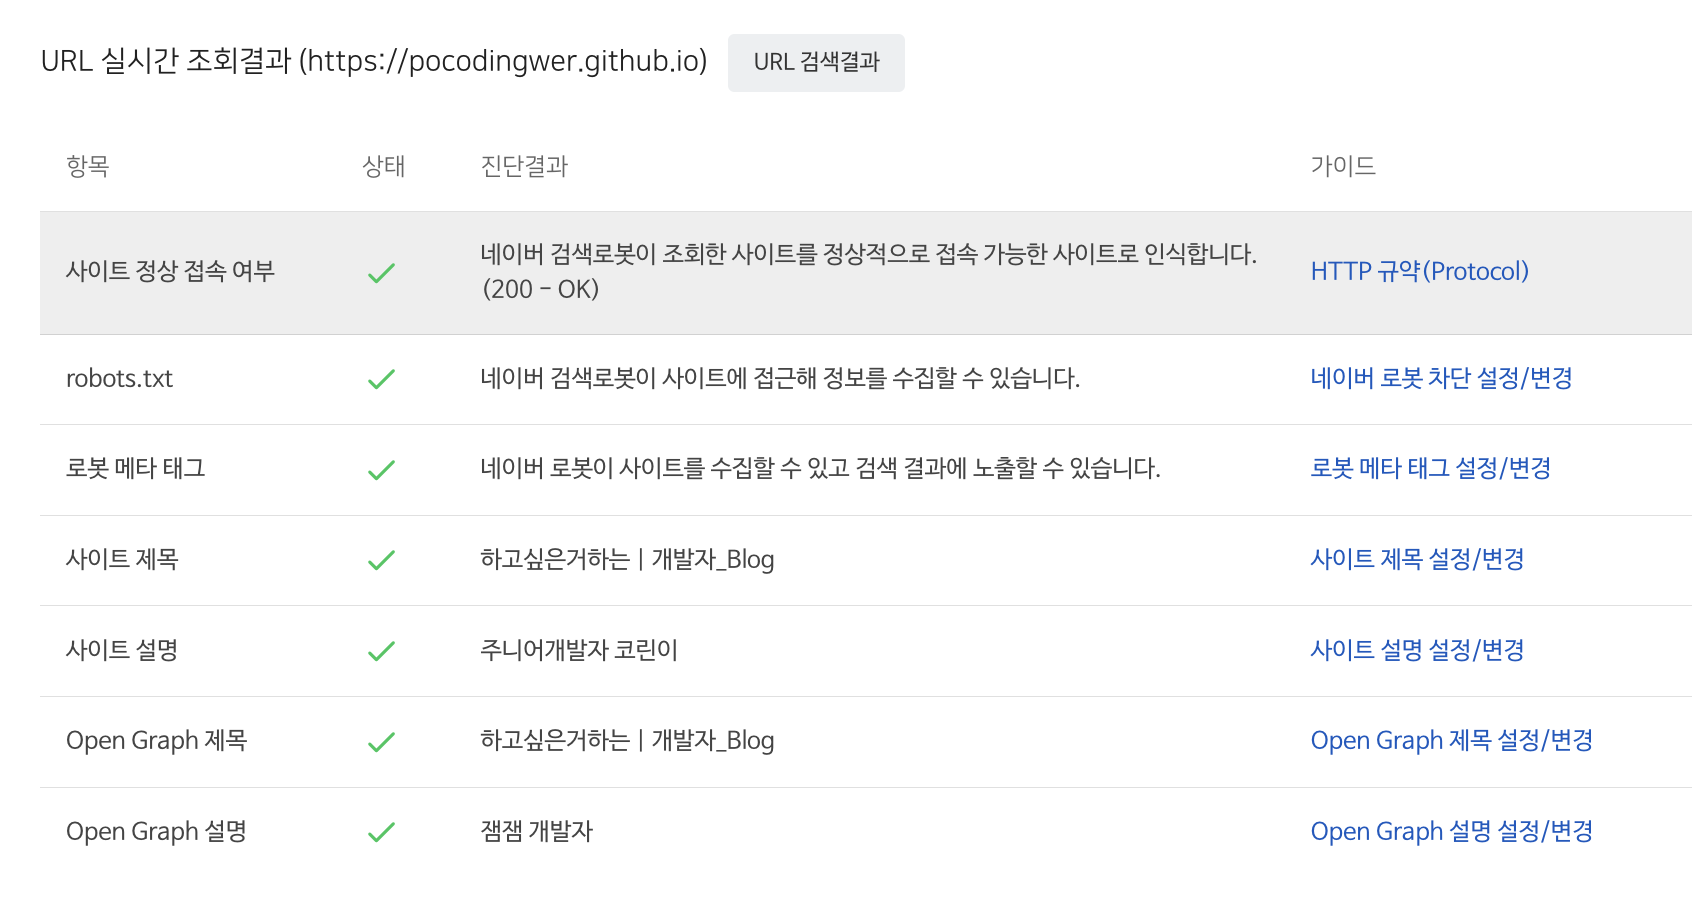
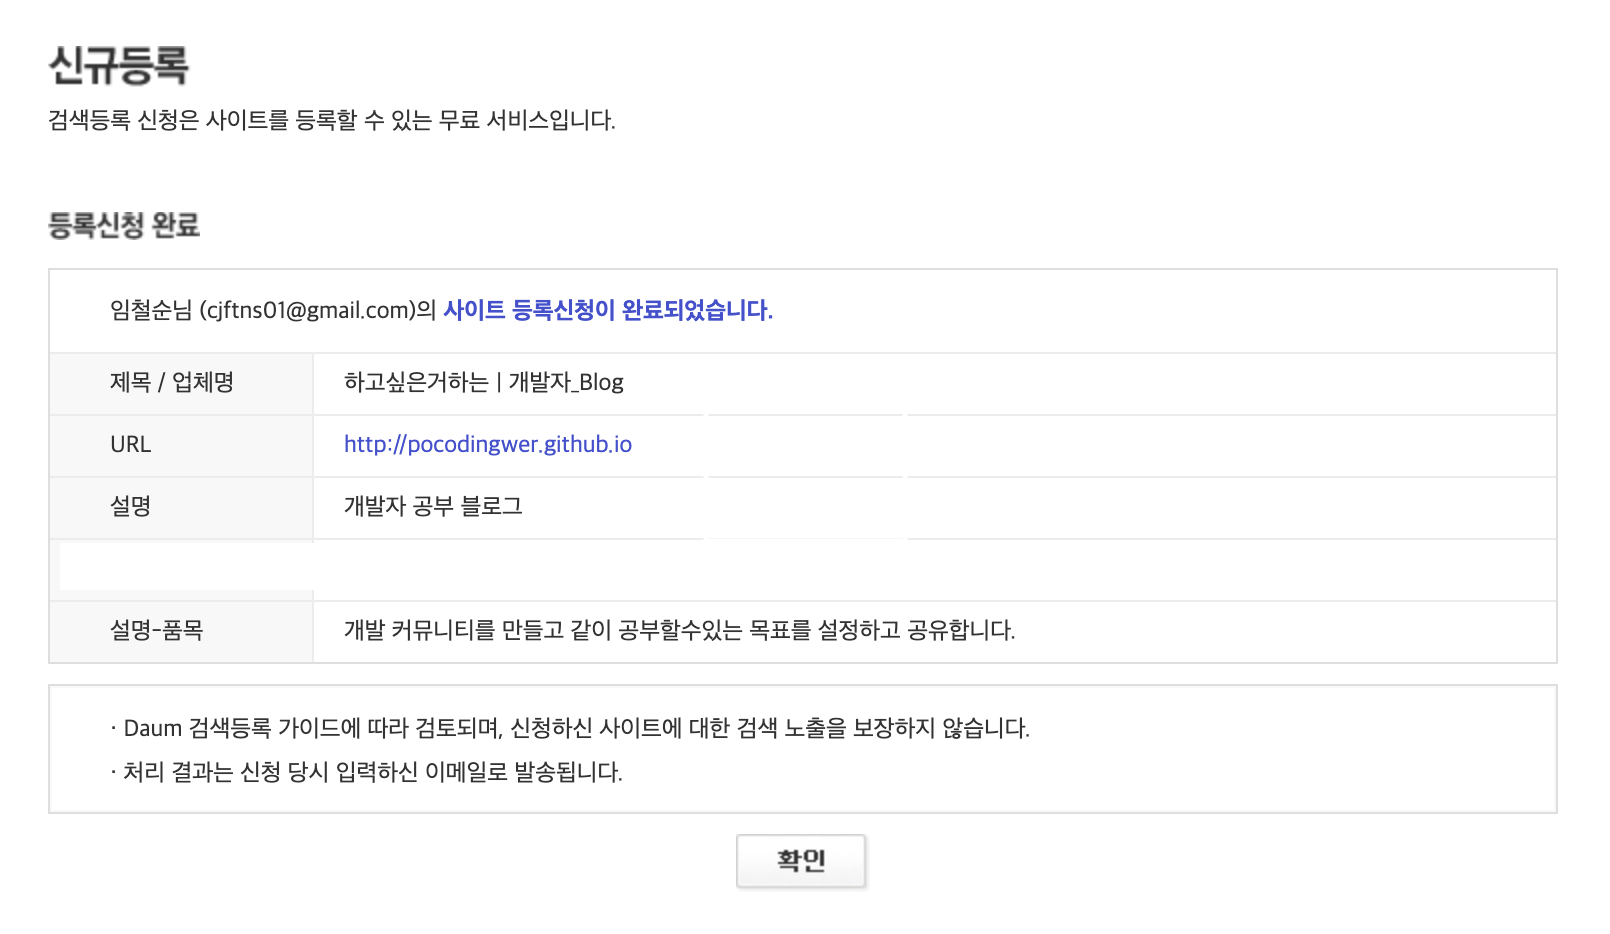
3.다음
- 다음에도 등록 《 daum search 》 접속
- 신규등록
- 사이트입력
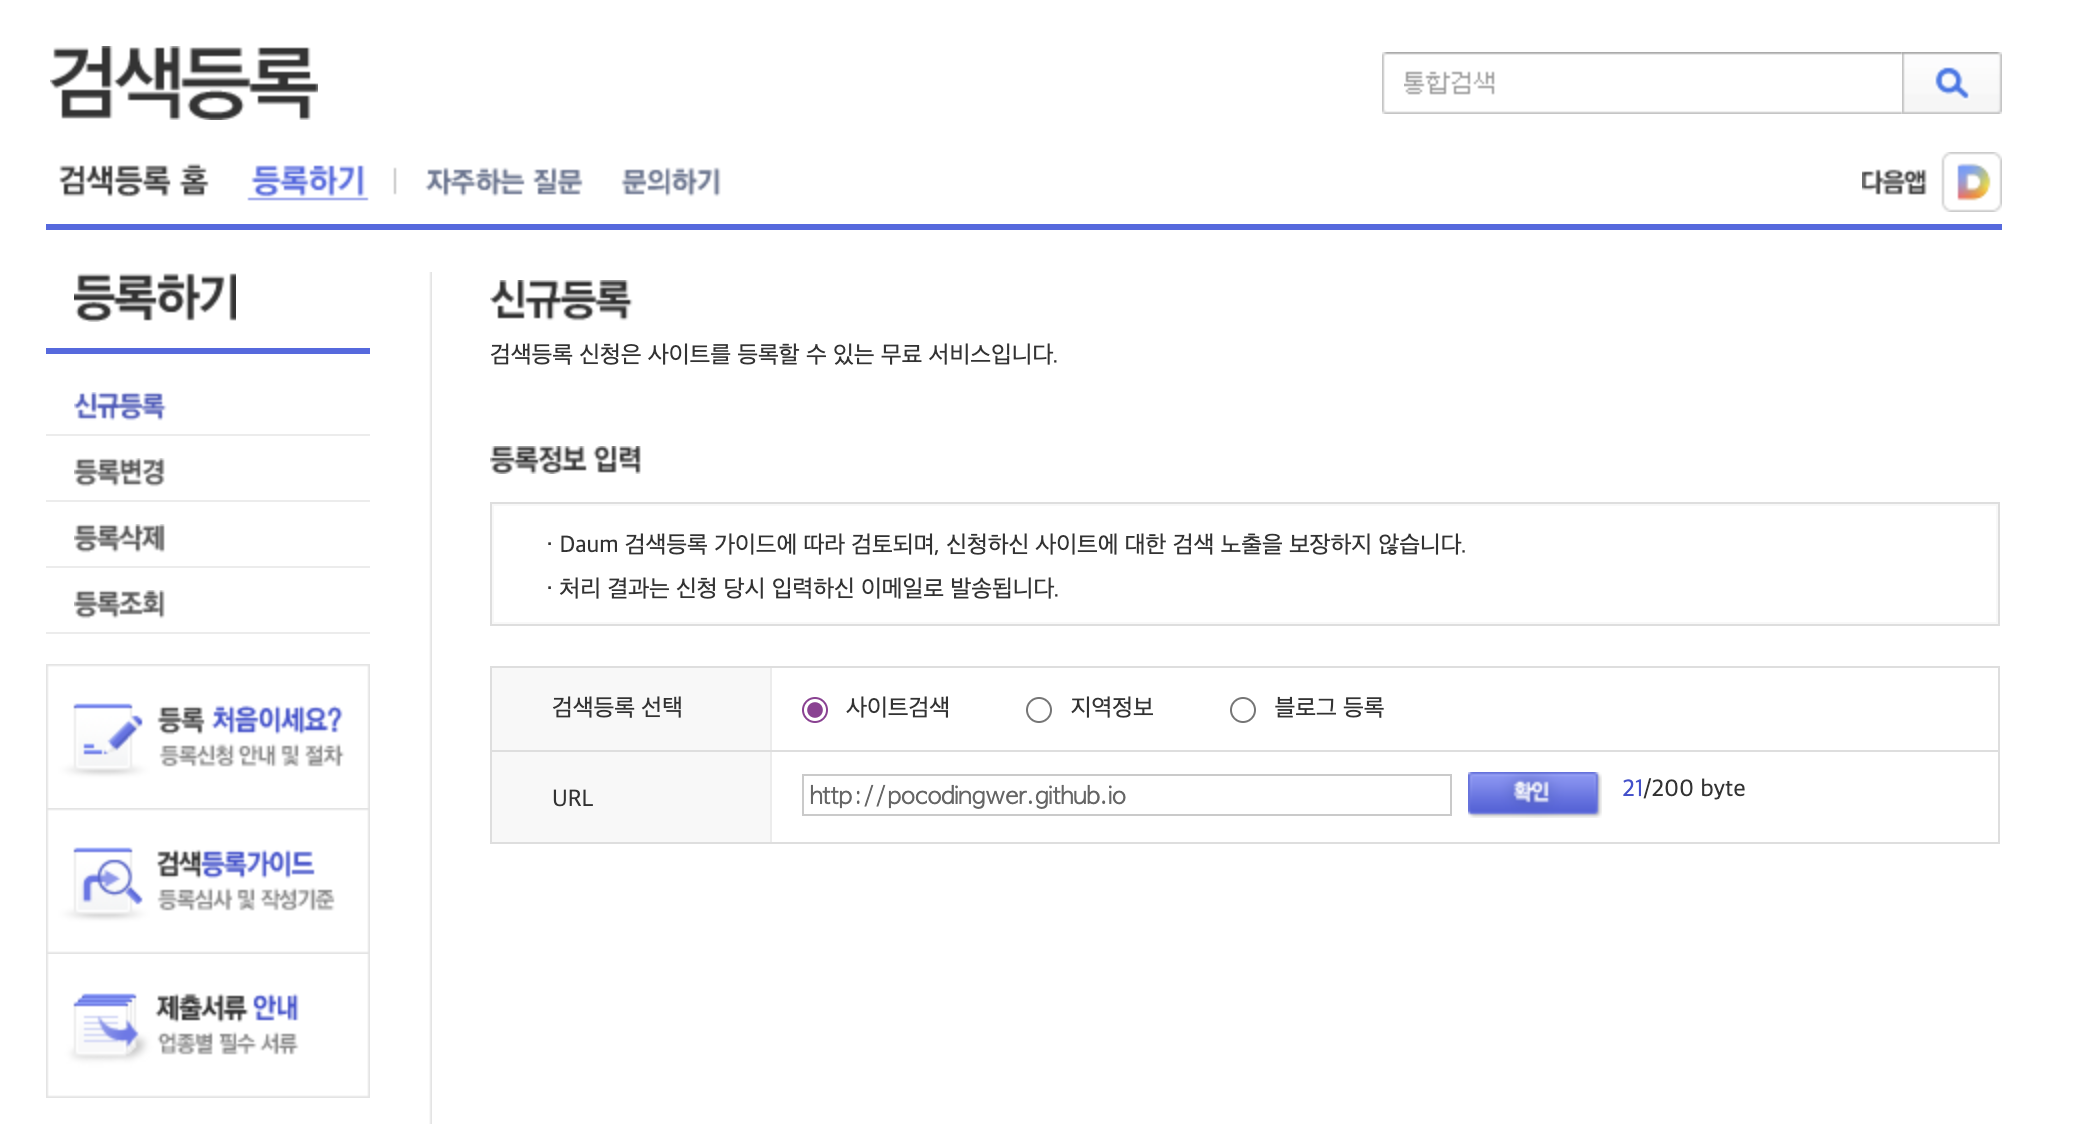
- 완료
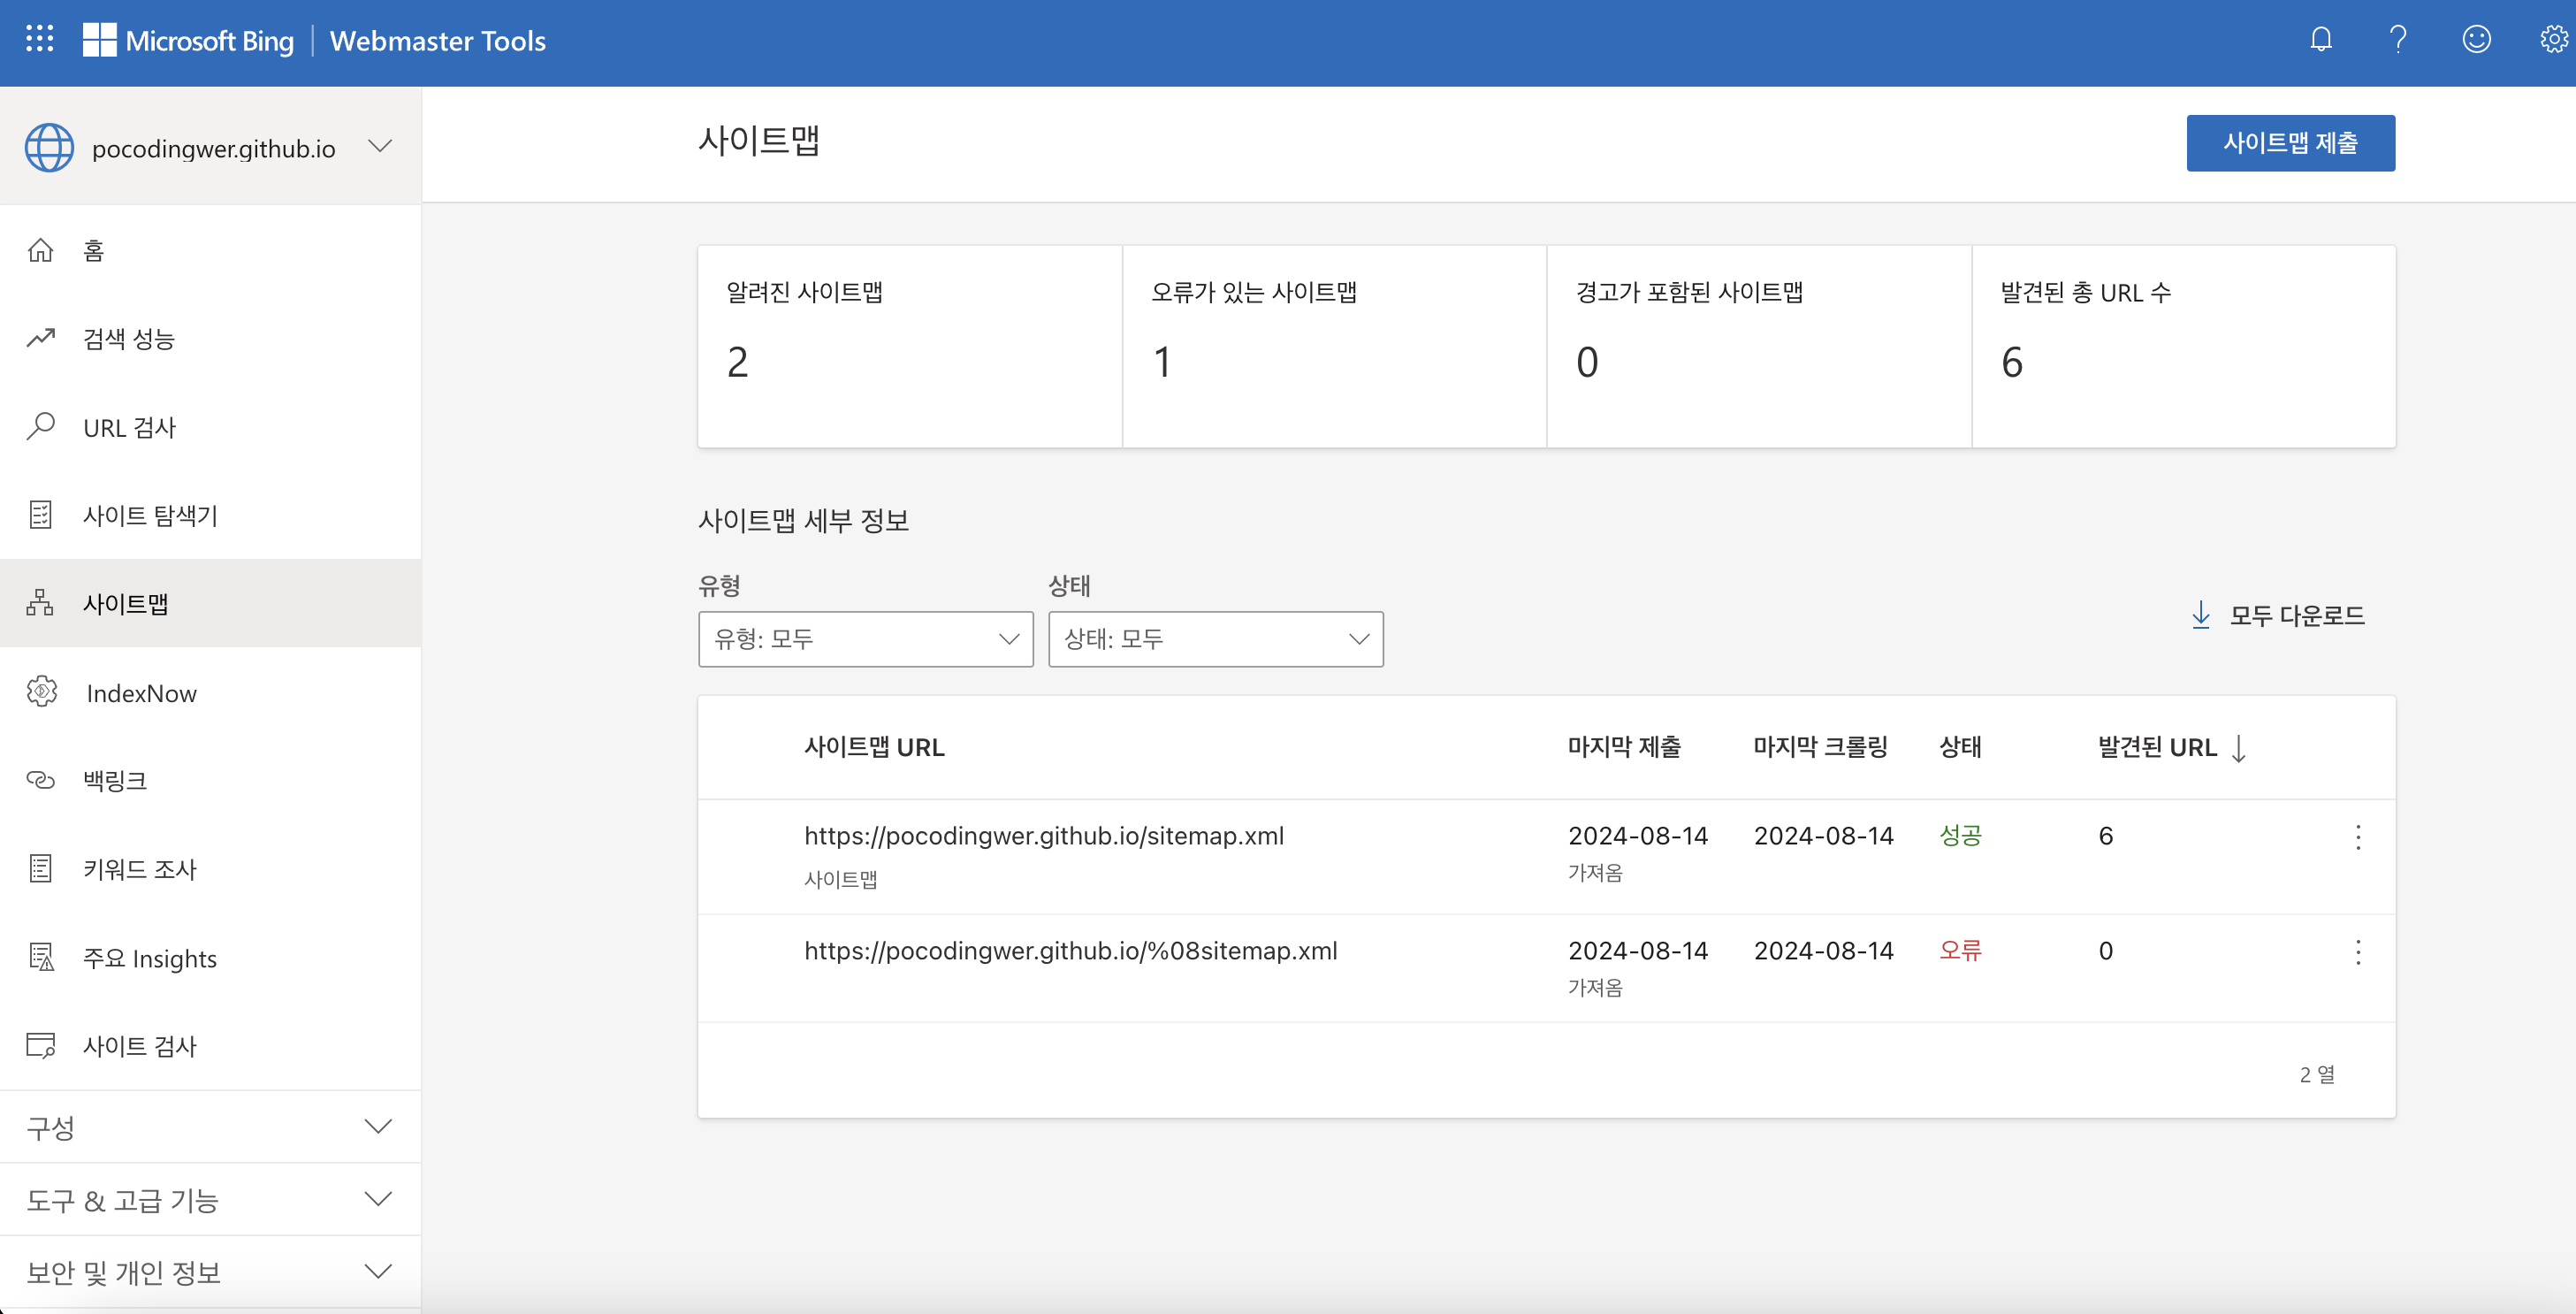
4.빙
- 빙 웹마스터 《 bing webmaster 》접속 로그인
- 구글로 로그인후 앞서 구글에 등록되어있는 정보를 가져올수있어서 가져오기사용!!
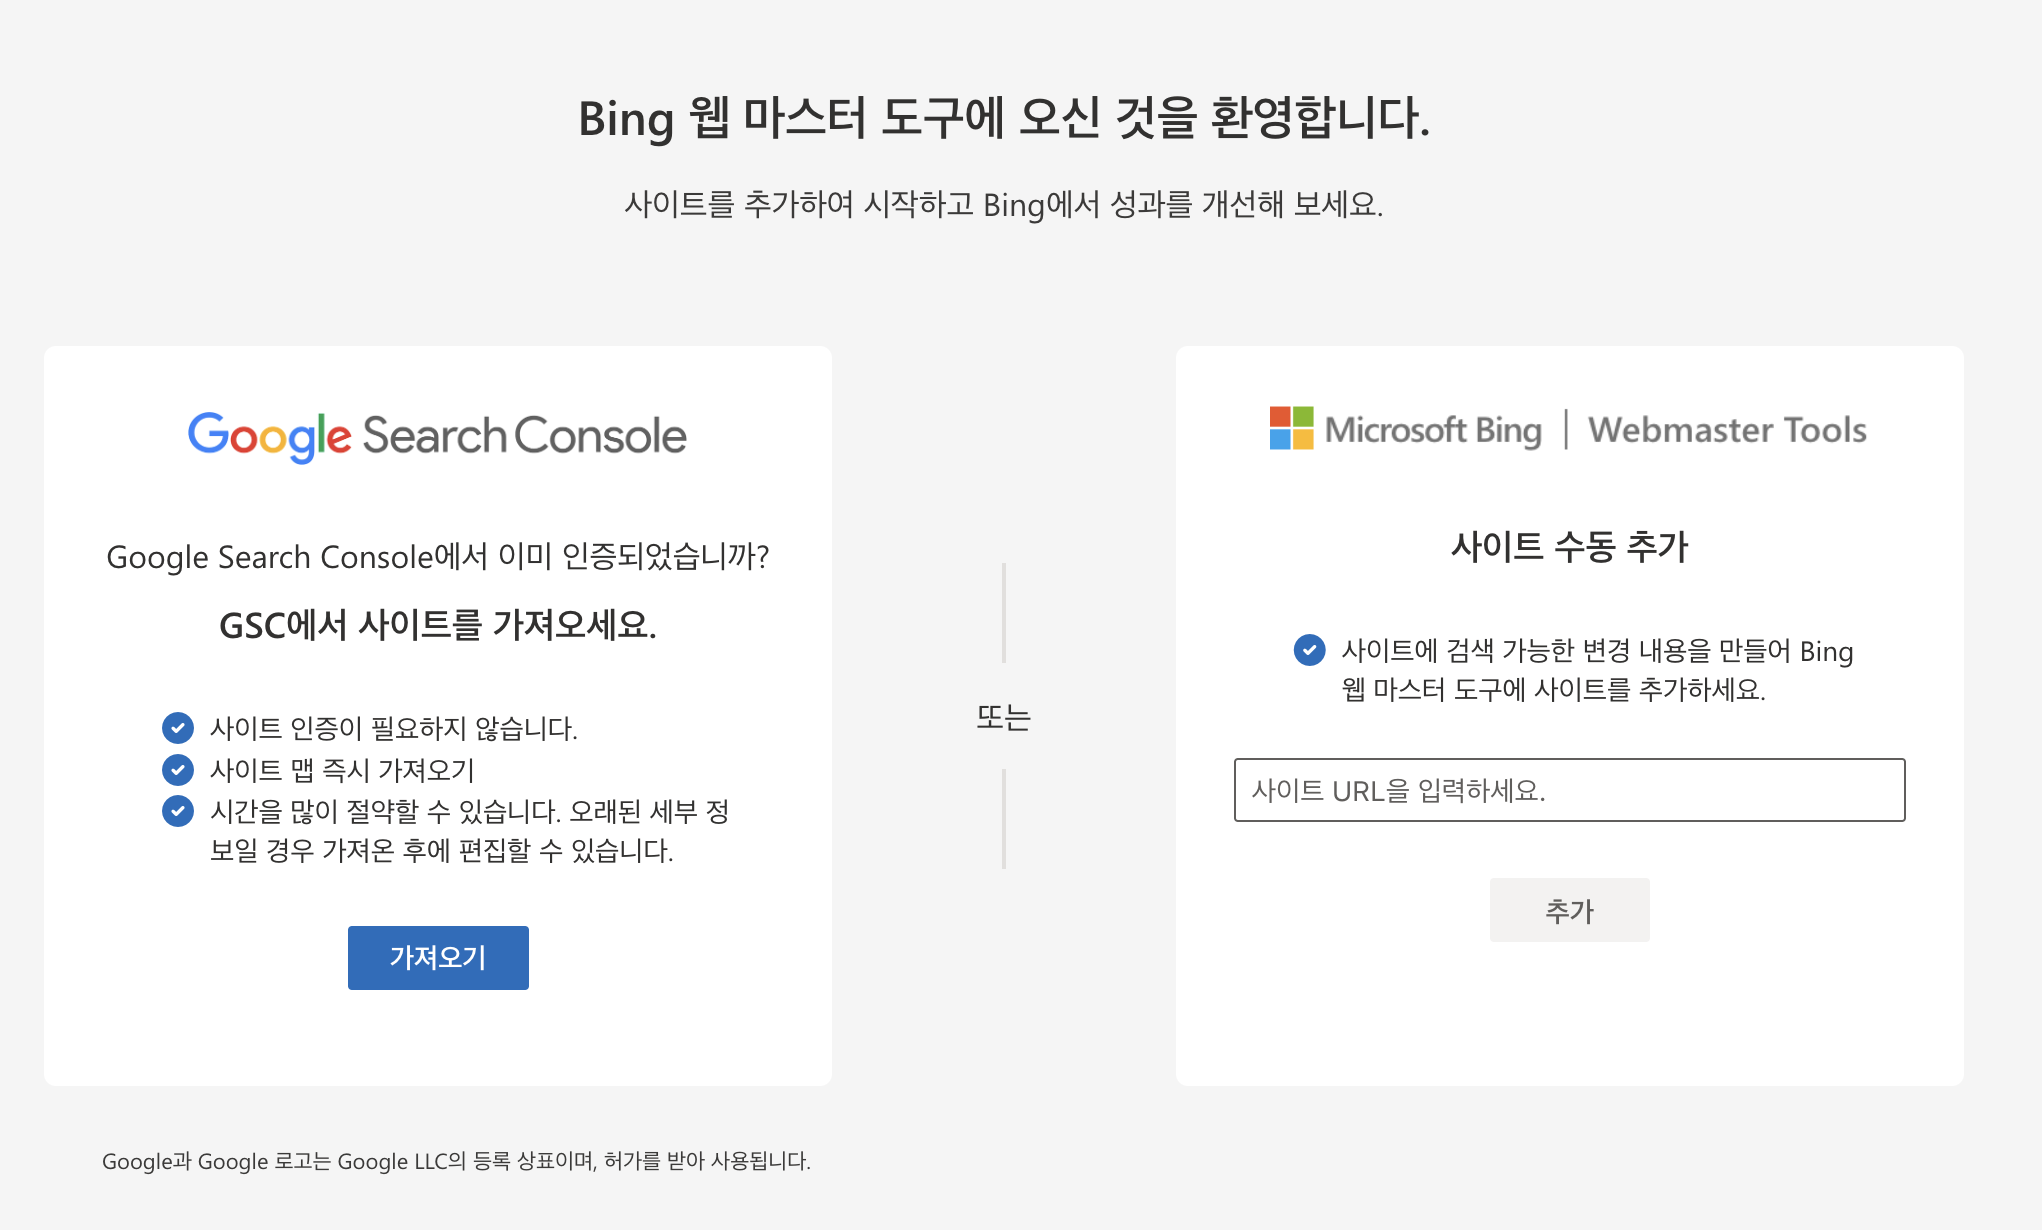

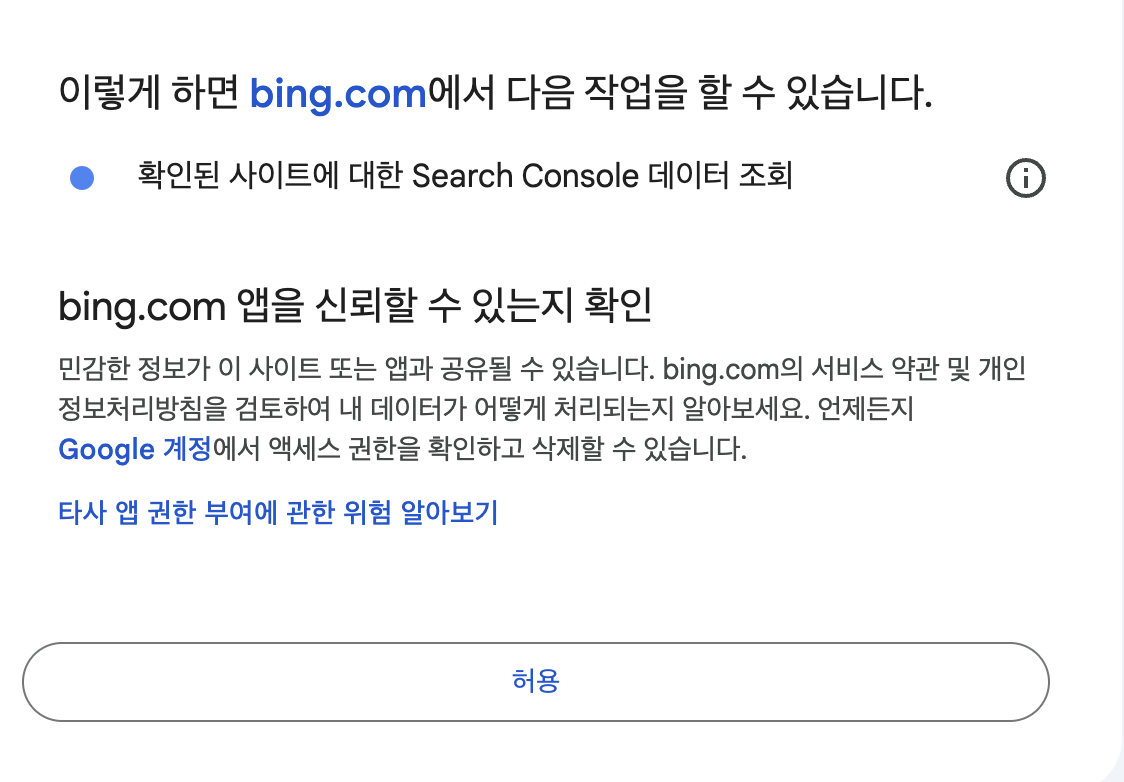
- 바로성공됨
마무리
하다보니깐 큰어려움 없이 적용잘 되었다. 개발자라면 오타는 항상 챙겨야될거같다. 하마터면 robots.txt 세팅을 못할뻔했네.. 빨리 크롤링되어서 구글이든 네이버에 내 블로그가 노출되는거 확인해보면 블로그 활동도 더 많이 할수있을 듯😭