[MCP]
- [DEVELOP] MCP(Model Context Protocol)
- [DEVELOP] MCP claude 적용하고 사용해보기
- [MCP] 통신 구조 flow 심층분석
- [MCP] AI Agent이용한 mcp서버 테스트 환경 구축해보자
- [MCP] 커서 mcp 추천
- [MCP] Playwright 사용해보기
- [MCP] 커서 mcp 추천2
- [MCP] Claude Desktop에 Voice Mode 설치하기
- [MCP] 커서 mcp 추천3 - 2026년 새로 떠오르는 MCP
깃허브랑 이런곳에 예제가 별로없어서 혼자 뚝딱해봄
예제 소스 https://github.com/POcodingWER/mcp_server-algorithm
참고자료 https://modelcontextprotocol.io/introduction
MCP git https://github.com/modelcontextprotocol/servers
🤖 AI Agent란?
AI Agent(에이전트)는 특정 목표를 달성하기 위해 자율적으로 행동하고 의사결정을 수행하는 인공지능 시스템입니다. 일반적인 AI 모델과 달리, Agent는 다음과 같은 특징을 가집니다:
✨ AI Agent의 주요 특징
- 🔍 환경 인식: 주변 환경을 감지하고 파악하는 능력
- 🎯 목표 지향적: 특정 목표를 달성하기 위해 행동
- 🧠 자율성: 외부 개입 없이 스스로 의사결정
- ⚙️ 도구 활용: 다양한 도구(API, 웹 검색 등)를 활용해 작업 수행
- 🔄 피드백 학습: 결과를 바탕으로 전략 수정 및 개선
🏗️ AI Agent의 구조
- 센서(입력): 환경으로부터 정보 수집
- 추론 엔진: 수집된 정보를 분석하고 결정
- 액추에이터(출력): 결정에 따라 행동 실행
- 메모리: 과거 경험과 지식 저장
🛠️ AI Agent의 응용 분야
- 💻 코딩 도우미: 자동으로 코드 작성, 디버깅, 테스트 수행
- 📊 데이터 분석가: 데이터 수집, 정제, 분석 자동화
- 🌐 웹 탐색기: 자동으로 웹 검색, 정보 수집 및 요약
- 📱 개인 비서: 일정 관리, 이메일 처리, 정보 검색
- 🛒 쇼핑 도우미: 최적의 제품 검색 및 추천
🔮 AI Agent의 발전 방향
최근 AI Agent 기술은 더욱 고도화되어 복잡한 작업을 수행할 수 있게 되었습니다:
- 🔗 멀티 에이전트 협업: 여러 에이전트가 서로 협력하여 복잡한 문제 해결
- 🧩 모듈형 설계: 다양한 기능을 조합하여 맞춤형 에이전트 구성
- 💬 자연어 인터페이스: 인간과 자연스러운 대화를 통한 지시 및 피드백
- 🔒 안전성과 윤리: 에이전트의 행동이 안전하고 윤리적인지 보장
🔬 MCP 테스트 환경 구축 가이드
MCP(Model Context Protocol)를 실제로 구현하고 테스트하는 방법을 알아보겠습니다. SSE와 stdio, 두 가지 주요 통신 방식의 테스트 환경을 구축해봅시다.
🌐 SSE 테스트 구축
SSE(Server-Sent Events)는 서버에서 클라이언트로 실시간 데이터를 스트리밍하는 웹 기술입니다. MCP에서는 이를 활용하여 AI Agent와 서버 간의 실시간 통신을 구현합니다.
📋 구현 단계
- 서버 설정: Express 서버와 MCP 서버를 통합
- 엔드포인트 구성: SSE 연결과 메시지 처리를 위한 라우트 설정
- 도구 등록: 테스트용 예제 도구 구현
💡 주요 특징
- 실시간 통신: 서버에서 클라이언트로 즉시 데이터 전송
- 자동 재연결: 연결 끊김 시 자동으로 재연결 시도
- 간단한 구현: 기존 HTTP 인프라 활용 가능
📜예제코드
1
2
3
4
5
6
7
8
9
10
11
12
13
14
15
16
17
18
19
20
21
22
23
24
25
26
27
import { McpServer } from "@modelcontextprotocol/sdk/server/mcp.js";
import { SSEServerTransport } from "@modelcontextprotocol/sdk/server/sse.js";
import express from "express";

const server = new McpServer({
  name: "Example SSE Server",
  version: "1.0.0",
});

// Register tools
server.tool("example_tool", { param: z.string() }, async ({ param }) => ({
  content: [{ type: "text", text: `Processed: ${param}` }],
}));

const app = express();
let transport: SSEServerTransport;

app.get("/sse", async (req, res) => {
  transport = new SSEServerTransport("/messages", res);
  await server.connect(transport);
});

app.post("/messages", async (req, res) => {
  await transport.handlePostMessage(req, res);
});

app.listen(3001);
-
curl TEST
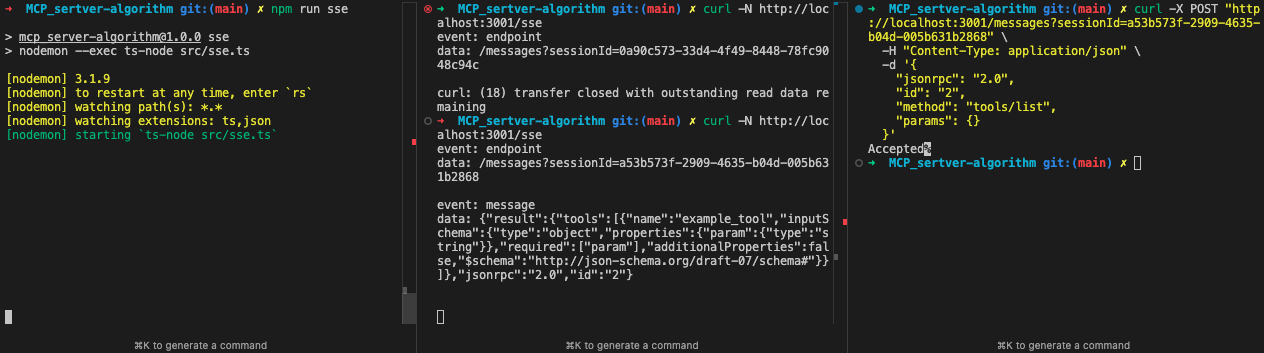
1
2
3
4
5
6
7
8
9
10
11
12
13
14
15
16
17
18
19
20
21
22
23
#터미널1
npm run sse

#터미널2
curl -N http://localhost:3001/sse
#sessionId 받아온다
event: endpoint
data: /messages?sessionId=a53b573f-2909-4635-b04d-005b631b2868

#터미널3
curl -X POST "http://localhost:3001/messages?sessionId=a53b573f-2909-4635-b04d-005b631b2868" \
  -H "Content-Type: application/json" \
  -d '{
    "jsonrpc": "2.0",
    "id": "2",
    "method": "tools/list",
    "params": {}
  }'

# 응답은 터미널 2에서 받아옴
event: message
data: {"result":{"tools":[{"name":"example_tool","inputSchema":{"type":"object","properties":{"param":{"type":"string"}},"required":["param"],"additionalProperties":false,"$schema":"http://json-schema.org/draft-07/schema#"}}]},"jsonrpc":"2.0","id":"2"}
-
mcp.json
1
2
3
4
5
6
7
{
  "mcpServers": {
    "algorithm-local": {
      "url": "http://localhost:3001/sse"
    }
  }
}
-
ai Agent 사용
 연결 확인후 명령어를 내려보자
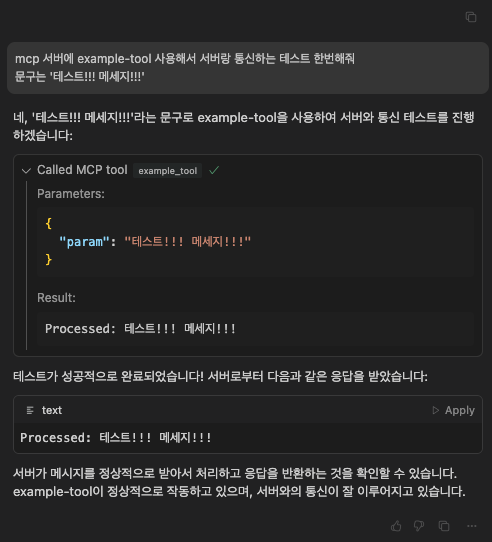
🔍 테스트 프로세스
- 서버 실행:
npm run sse로 서버 시작 - 연결 수립: curl을 통한 SSE 연결 설정
- 세션 관리: 고유한 sessionId를 통한 통신
- 도구 호출: JSON-RPC 형식의 메시지로 도구 실행
🖥️ stdio 테스트 구축
stdio(Standard Input/Output)는 프로세스 간 통신을 위한 기본적인 입출력 시스템입니다. Docker 컨테이너를 활용하여 격리된 환경에서 안전하게 테스트할 수 있습니다.
🎯 특징과 장점
- 보안성: 격리된 환경에서 안전한 실행
- 이식성: Docker를 통한 환경 일관성 보장
- 확장성: 컨테이너화로 쉬운 배포와 확장
📦 구현 단계
- 서버 코드 작성: stdio 통신을 처리하는 MCP 서버 구현
- Docker 환경 구성: 멀티 스테이지 빌드로 최적화된 이미지 생성
- 통신 테스트: AI Agent를 통한 도구 호출 검증
🛠️ Docker 설정 주요 포인트
- 멀티 스테이지 빌드: 최적화된 이미지 크기
- TypeScript 직접 실행: 개발 편의성 확보
- 볼륨 마운트: 로컬 파일시스템 접근 가능
📋예제코드
1
2
3
4
5
6
7
8
9
10
11
12
13
14
15
16
17
18
19
20
21
22
23
24
25
26
27
28
29
import { StdioServerTransport } from "@modelcontextprotocol/sdk/server/stdio.js";
import { McpServer } from "@modelcontextprotocol/sdk/server/mcp.js";
import { z } from "zod";

const server = new McpServer({
  name: "Example SSE Server",
  version: "1.0.0",
});

server.tool("example_tool", { param: z.string() }, async ({ param }) => ({
  content: [{ type: "text", text: `Processed: ${param}` }],
}));

async function main() {
  const transport = new StdioServerTransport();

  console.log("MCP 서버가 stdio 모드로 시작되었습니다...");
  await server.connect(transport);

  process.on("SIGINT", async () => {
    await server.close();
    process.exit(0);
  });
}

main().catch((error) => {
  console.error("서버 오류:", error);
  process.exit(1);
});
-
test
1
2
3
4
5
6
7
8
9
10
11
12
13
14
15
16
17
18
#서버실행
npm run dev

#stdio 입력
{"jsonrpc":"2.0","id":"1","method":"tools/call","params":{"name":"example_tool","arguments":{"param":"테스트!!! 메세지!!!"}}}

#결과
> mcp_server-algorithm@1.0.0 dev /Users/soon/Desktop/MCP_sertver-algorithm
> nodemon --exec ts-node src/index.ts --ext ts,json

[nodemon] 3.1.9
[nodemon] to restart at any time, enter `rs`
[nodemon] watching path(s): *.*
[nodemon] watching extensions: ts,json
[nodemon] starting `ts-node src/index.ts`
MCP 서버가 stdio 모드로 시작되었습니다...
{"jsonrpc":"2.0","id":"1","method":"tools/call","params":{"name":"example_tool","arguments":{"param":"테스트!!! 메세지!!!"}}}
{"result":{"content":[{"type":"text","text":"Processed: 테스트!!! 메세지!!!"}]},"jsonrpc":"2.0","id":"1"}
-
docker settings
1
2
3
4
5
6
7
8
9
10
11
12
13
14
15
16
17
18
19
20
21
22
23
24
25
26
27
28
FROM node:20-alpine AS builder

WORKDIR /app

# 의존성 파일 복사 및 설치
COPY package.json .
RUN npm install -g pnpm
RUN pnpm install

# 소스 코드 복사 및 dist 폴더 생성
COPY . .
RUN mkdir -p dist

# ts-node를 사용하여 TypeScript 직접 실행을 위한 준비
FROM node:20-alpine

WORKDIR /app

# 실행 환경으로 필요한 파일만 복사
COPY --from=builder /app/package.json .
COPY --from=builder /app/pnpm-lock.yaml .
COPY --from=builder /app/src ./src
COPY --from=builder /app/tsconfig.json .
COPY --from=builder /app/tsconfig.node.json .
COPY --from=builder /app/node_modules ./node_modules

# ts-node로 직접 실행
CMD ["npx", "ts-node", "src/index.ts"]
-
빌드실행
1
docker build -t mcp-test .
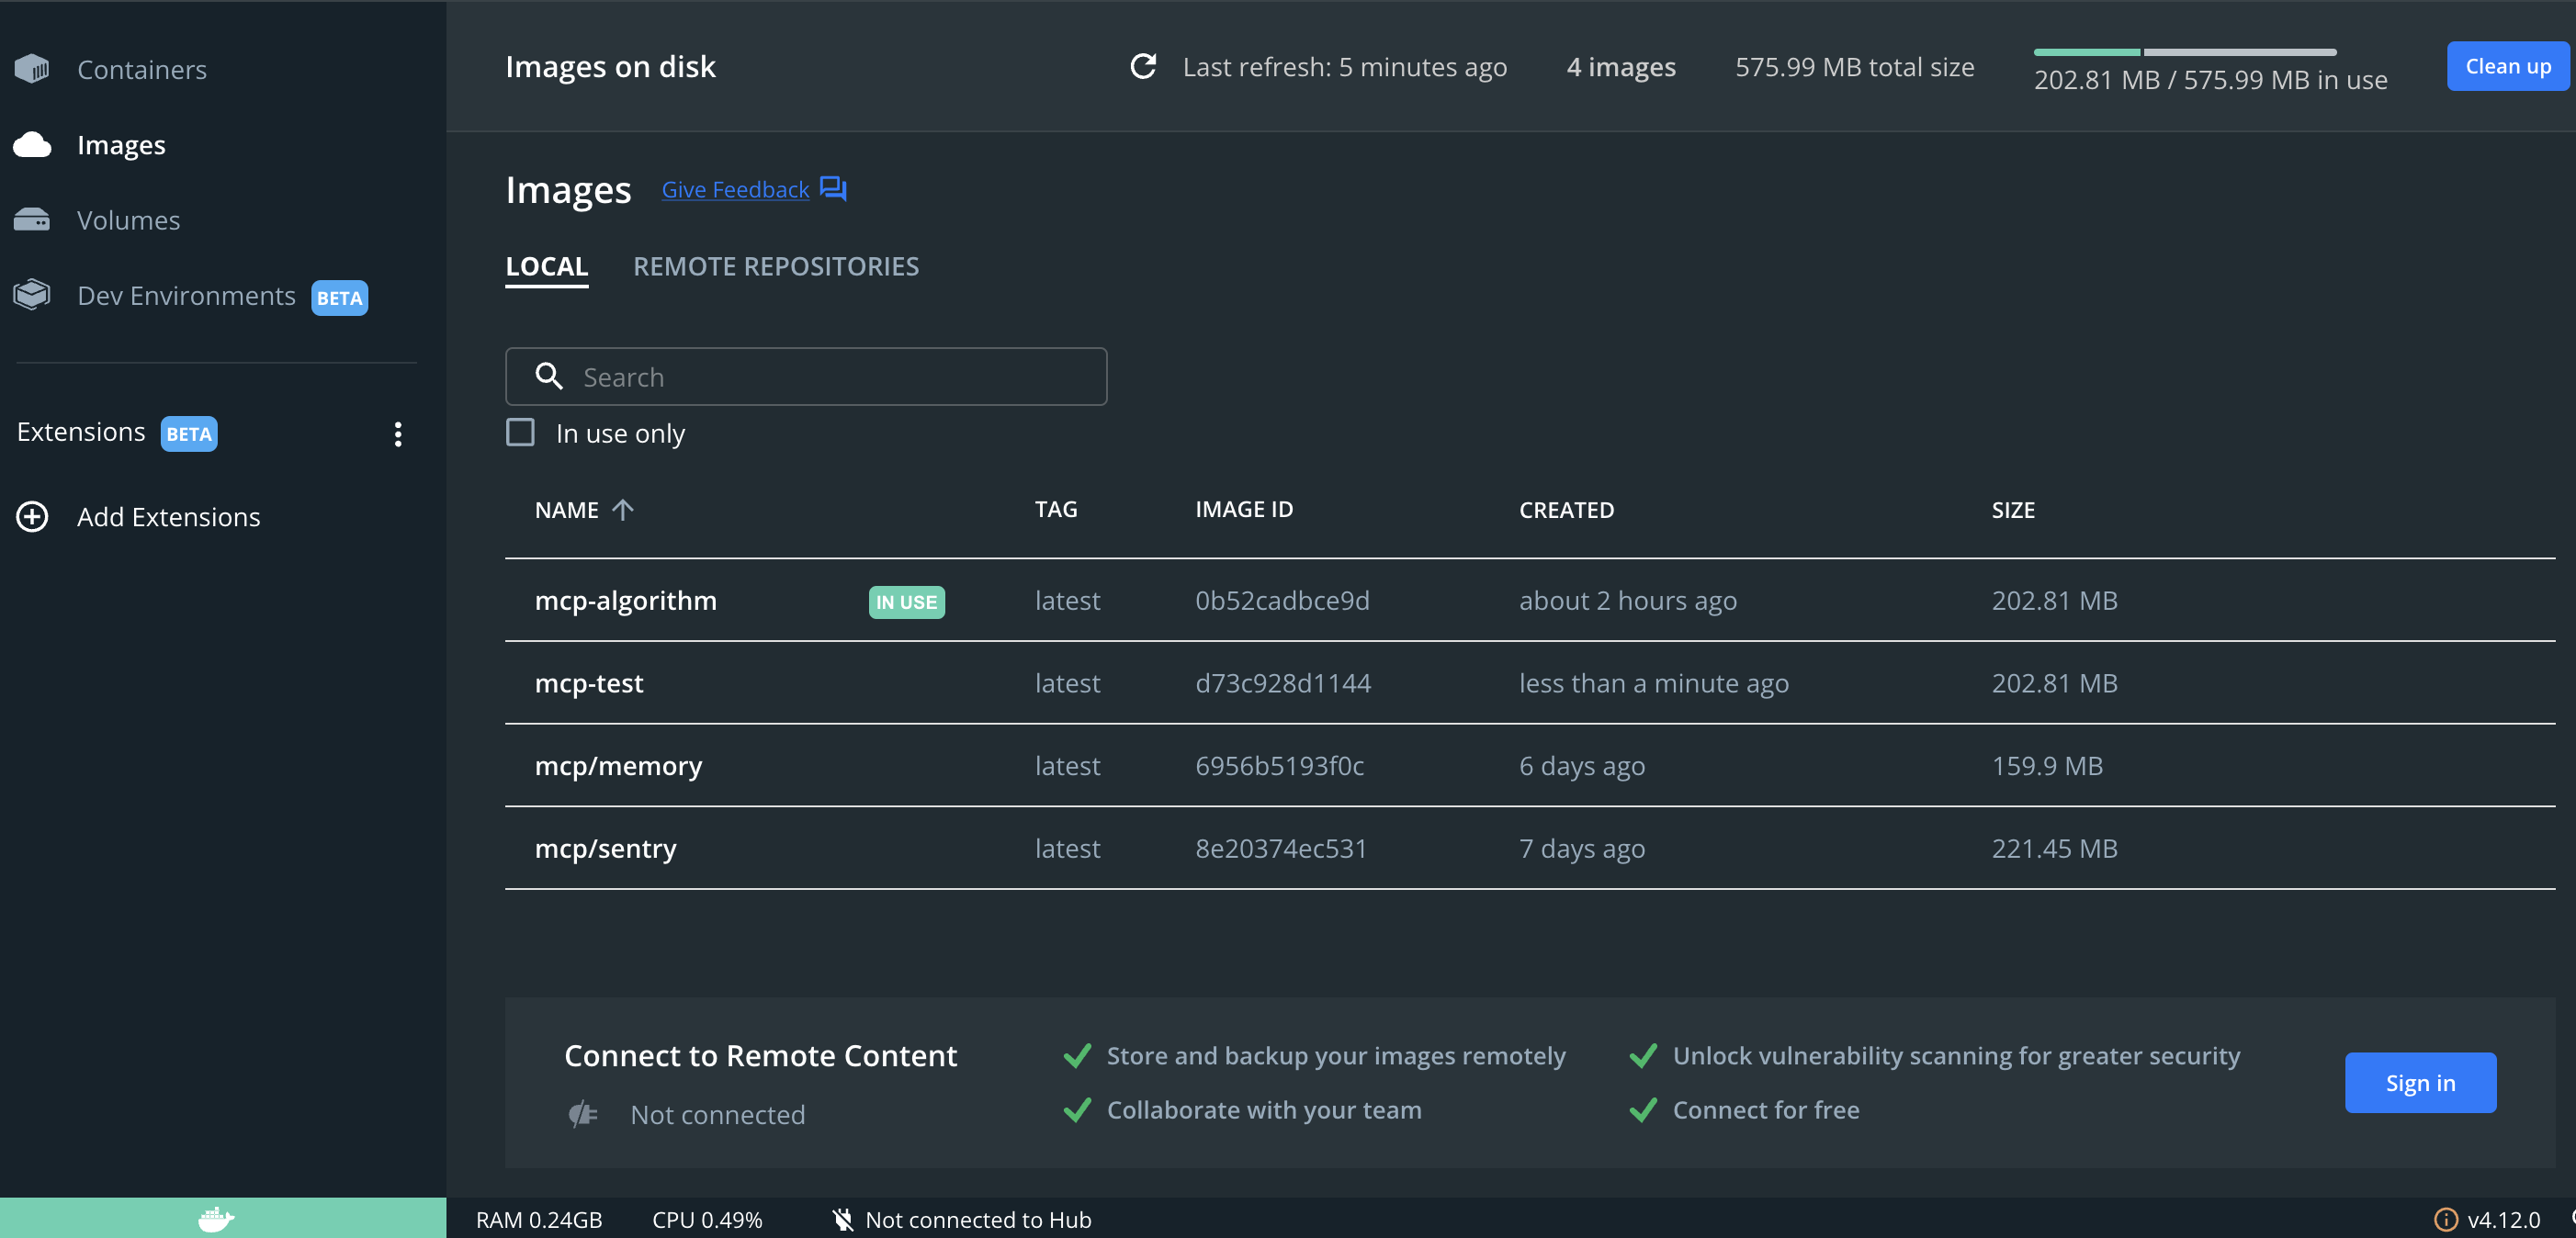 mcp-test 추가된거 확인할수있다.
 -
mcp Json
1
2
3
4
5
6
7
8
{
  "mcpServers": {
    "algorithm-stdio": {
      "command": "docker",
      "args": ["run", "-i", "-v", "--rm", "mcp-test"]
    }
  }
}
-
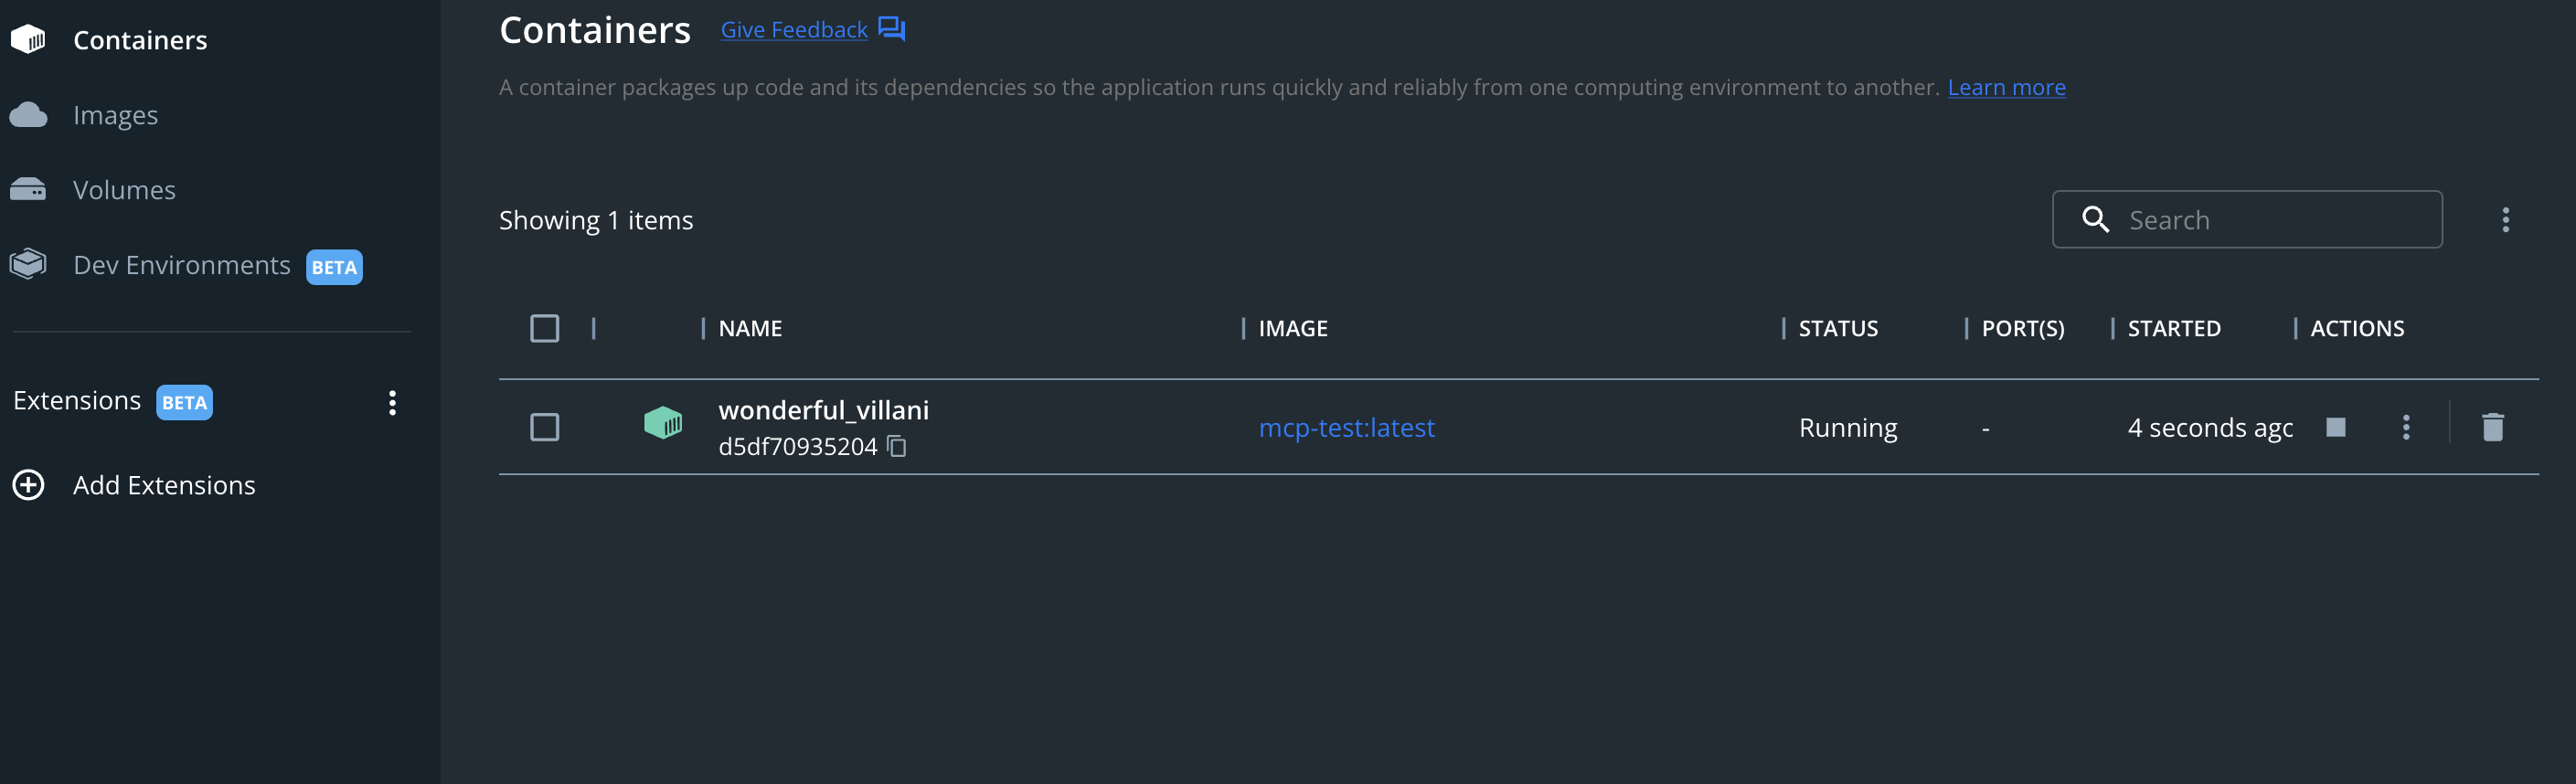
mcp 실행 도커에 컨테이너가 실행되면서 stdio-mcp가 활성화 된것을 확인할수있음

-
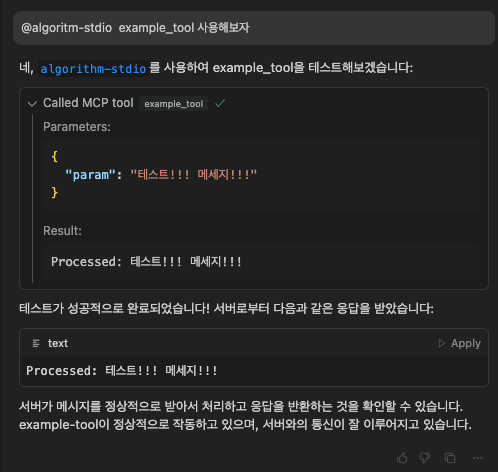
test
🎯 결론 및 비교 분석
SSE vs stdio 비교
| 특징 | SSE | stdio |
|---|---|---|
| 🚀 개발 속도 | 빠른 개발과 즉시 테스트 가능 | 초기 설정에 시간 소요 |
| 🔒 보안성 | 기본적인 HTTP 보안 | Docker 격리로 높은 보안성 |
| 🔄 배포 용이성 | 간단한 웹 서버 배포 | 컨테이너화로 일관된 배포 |
| 🛠️ 유지보수 | 즉각적인 수정과 적용 | 이미지 재빌드 필요 |
💡 권장 사용 시나리오
-
개발 단계: SSE 방식 권장
- 빠른 피드백 루프
- 즉각적인 코드 수정
- 간편한 디버깅
-
프로덕션 환경: stdio + Docker 권장
- 안정적인 실행 환경
- 보안성 강화
- 확장성 있는 구조
💡 TIP: 개발 초기에는 SSE로 빠르게 프로토타입을 만들고, 안정화 단계에서 stdio + Docker로 마이그레이션하는 전략을 추천합니다.다.